Prerequisites
Before starting, make sure that:
- Your Zebra printer is installed and connected to a computer. For detailed instructions, please refer to this article.
- Badge printing works correctly from the Eventtia backoffice.

- The On Site app is installed on the mobile devices that will be used for check-in.
Step 1: Request Feature Activation
-
This functionality must be activated by Eventtia for each event.
-
Contact help@eventtia.com and provide the Event ID for which you want to enable automatic badge printing.
Step 2: Identify the Check-in Users and the Event ID
-
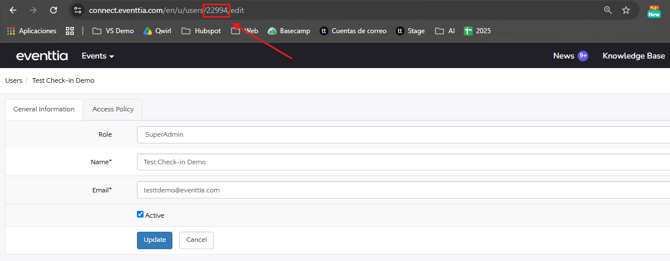
Gather the User IDs of all staff members who will perform attendee check-in using the On Site app. These IDs will be used to configure the printing station.
- You can find the User ID by going to their profile settings:
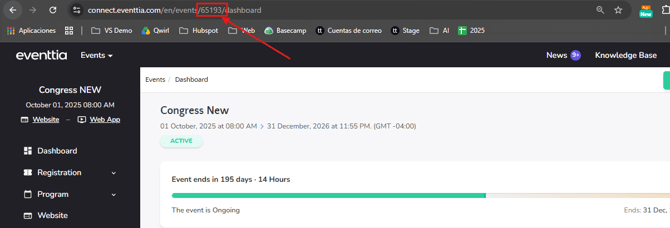
- You can find the Event ID in the URL of any page within the event configuration. Simply open your event in the Eventtia backoffice and look for the numeric value in the URL.
Step 3: Create the Print URL
For each printing station, build a Print URL by inserting the Event ID and the User ID(s) into the URL template below. The URL becomes functional once all required parameters are provided and the URL is correctly composed.
URL template:
https://connect.eventtia.com/en/events/{EVENT_ID}/attendees/autoregistration-print-daemon?user_ids={USER_IDS}&printer=zebra
Where:- {EVENT_ID} = Your Event ID
- {USER_IDS} = One or more User IDs separated by commas
Multiple users sharing the same printer example:
-
https://connect.eventtia.com/en/events/52251/attendees/autoregistration-print-daemon?user_ids=1234,4321,5678&printer=zebra
Step 4: Configure the Printing Station
On the computer connected to the Zebra printer:
- Open the Print URL in a browser tab.
- Keep this tab open during the entire event.
- Log in to the Eventtia backoffice.
- Make sure all assigned users are logged into the On Site app on their mobile devices.
Step 5: Scan and Print
When a staff member scans an attendee's QR code in the OnSite app:
- The attendee is checked in.
- A print request is automatically generated.
- The Print URL receives the request.
- The badge is printed automatically on the connected Zebra printer.
Important Notes
- The Print URL browser tab must remain open throughout the event.
- The feature must be activated separately for each event.
- Multiple users can share the same printing station.
- If you need multiple printers, create a separate Print URL for each station and assign the corresponding User IDs.
- Custom badge layouts can be used by configuring a custom ZPL template.
Troubleshooting
| Issue | Solution |
|---|---|
| Nothing prints after scanning a QR code | Verify that the Print Daemon page is still open and active. |
| The printer does not respond | Check the printer connection and test manual badge printing from the backoffice. |
| The badge prints on the wrong printer | Verify that the correct User IDs are assigned to the appropriate Print Daemon URL. |