Step 1.
-
Go to the Eventtia homepage and sign in with your email and password:
Step 2.
- To create a new event, click on the "Actions" button located on the upper-right corner of the screen, and then select "Create event"

Step 3.
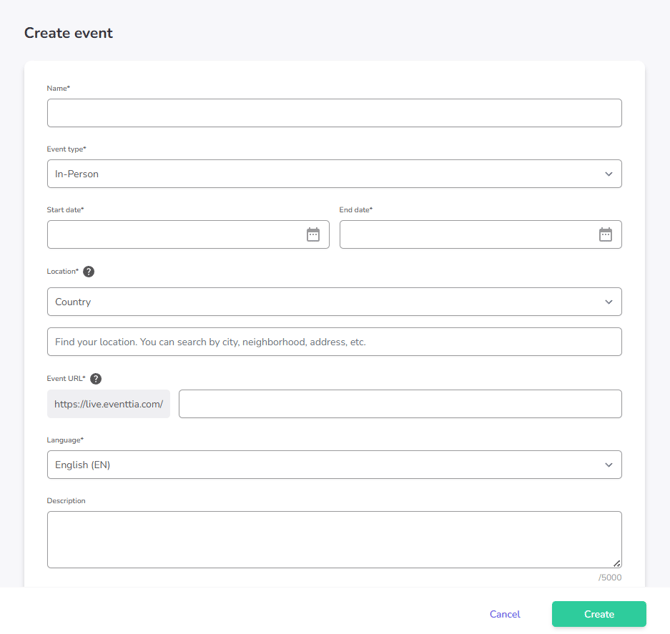
A screen will appear where you will need to enter your event’s basic information. This section contains general details about your event, including several mandatory fields that must be completed
-
Name of your event
- Event type
-
Start/End date & time
- Attendance mode (virtual, hybrid or in-person)
-
Location: You will be able to choose the country, region & city where your event will take place. You can also add more specific location details, such as the address, street name, or venue. This information will be mentioned in all communications sent from the platform for in-person events.
-
Event URL
-
Language used for your event
-
Description of your event, if you want to include further details
Important note: If you want to include some Keywords for your participants to find your event quicker on Internet Search Engines you should write them down on the Description of your event
With this information already entered, your event has been created and you will be redirected to the next page, where you'll find the full event configuration interface and its different modules.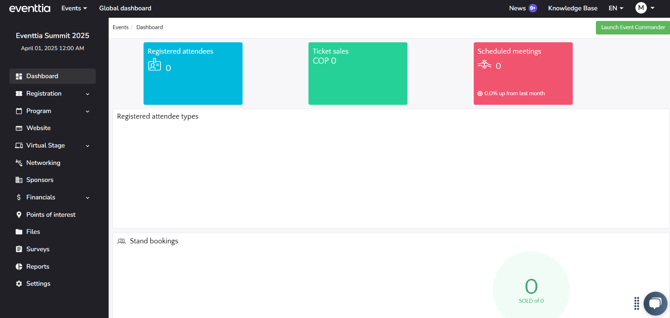
To continue with the general event setup and add more important details, you can go to the last module on the list: "Settings."
This module is designed to help you complete and fine-tune the overall configuration of your event.
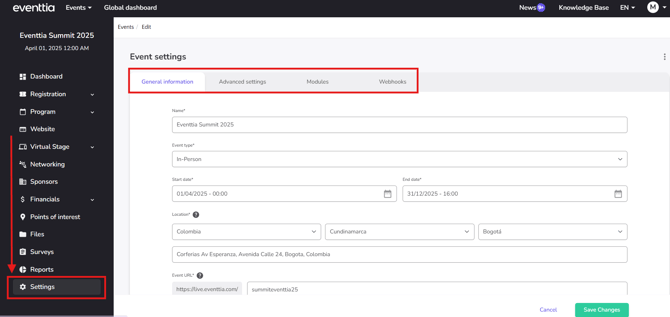
On this page, you’ll find several tabs that allow you to manage different aspects of your event:
General Information:
-
Update the basic event details such as name, dates, description, and type.
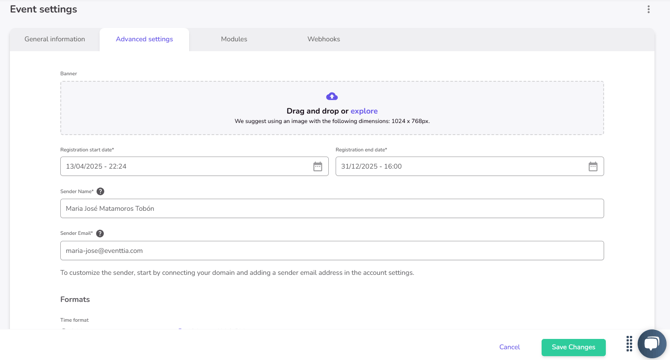
Advanced Settings:
In this tab, you will be able to fill in additional general settings and information relevant to your event. These include:
-
Banner: Upload a banner image for your event. We recommend using an image with the following dimensions: 1024 x 768 px. You can drag and drop your file or explore your folders to upload it.
-
Registration start and end dates: Define the exact opening and closing date/time of your event registration period.
-
Sender Name and Sender Email: These fields define the name and email address that will appear as the sender of your automated event emails.
-
Formats: Time format (12h / 24h), date format (dd/mm/yyyy / mm/dd/yyyy) and thousands separator (period / comma)
-
Two types of Google tracking codes (for analytics and marketing)
-
Payment settings: Currency, VAT % and the Payment provider used for your event — please note: once an attendee has registered, this information cannot be modified. In this secction, you can view and manage available payment gateways such as Stripe, PayU, and PayPal. Read this article to learn more about integrations.
-
Internal notes and description: A private section for event collaborators to share relevant internal notes. These are only visible to users with access to the event (not attendees).
Modules:
This section allows you to activate/deactivate the different modules that will be used in your event. For example, If you plan to offer sponsor stands at your event, then you should use the "Exhibitors" module, or, if you are hosting a B2B networking session, make sure to have the "Networking" field checked.
 Step. 4
-
Once you have created your event, you will be able to find it under the "Ongoing & Upcoming" filter in the "Existing" events section on your event dashboard.
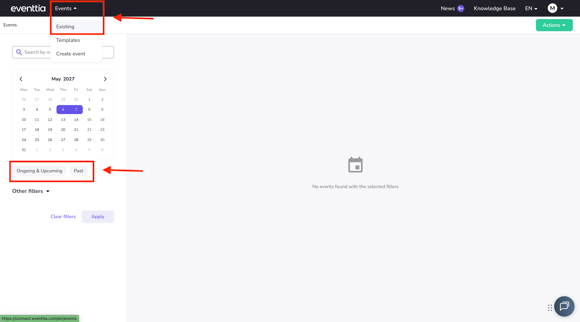
-
You can also see any events which have already taken place in the "Past" filter.
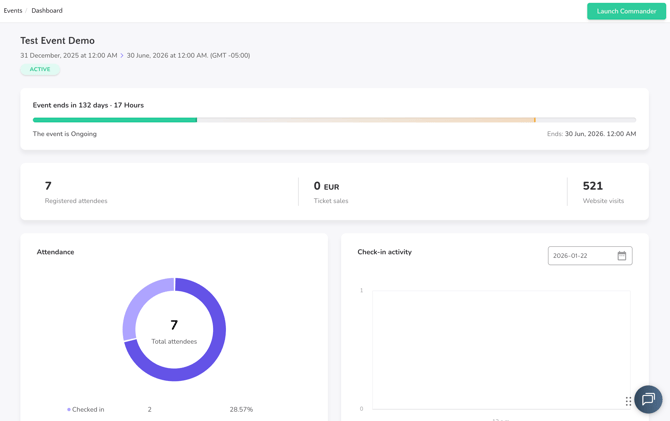
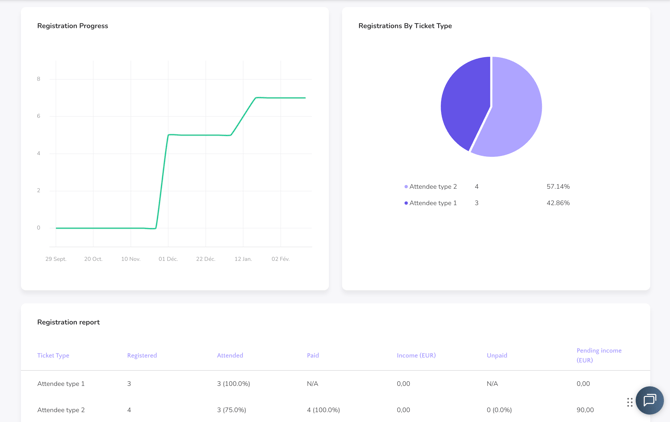
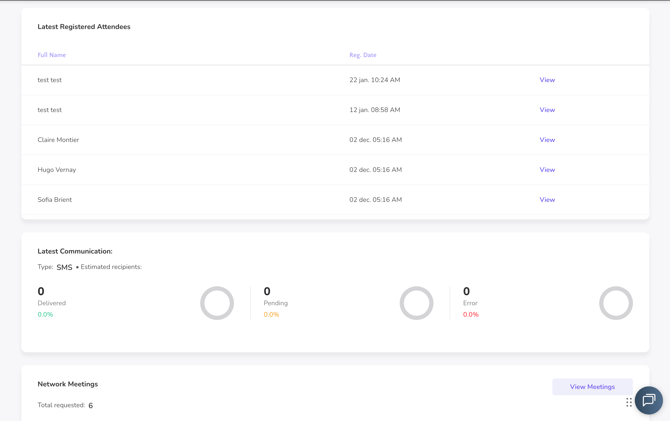
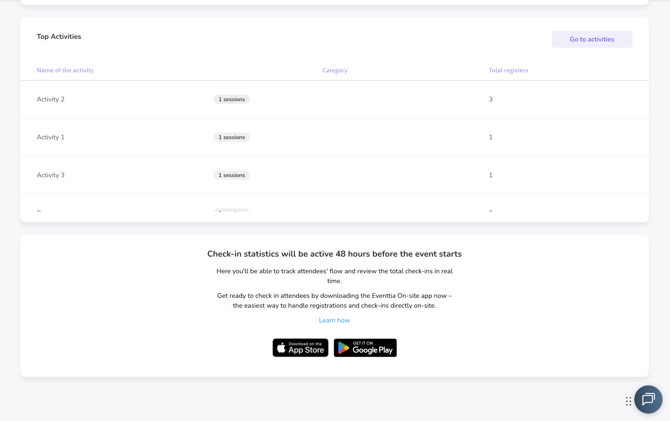
Step 5.
-
Finally, in the "Global Dashboard" tab, you will be able to see the statistics for all the events in your account, with information about payments, registration and more.