In this guide, we’ll cover the essential steps to build and share a clear, useful, and engaging survey.
Step1.
- Go to "Survey" module.
- Click on the green "Action" button and then select "New."

- Name your survey (Required).
- Add a small description (optional).
- Choose one or more type(s) of attendee(s).
- Activate survey by clicking "Enable" (It is best to select this option once the survey is ready to be released).
- Select : survey

- Once you save your survey, you will be taken directly to the Questions tab.
Step 2:
- Click on the "Question" tab and then on the green "Add new question" button.

- Indicate the "Field Name" (the question to ask)
- Then choose the "Type", (the answer mode you want to apply to the question):
- Text field
- Text area
- Unique Selection
- Multiple selection
-
- Label
- Single selection
- Rating

- Select the validation type
- You can tick the field as "Required" so that the question cannot be avoided.
- "Save" and repeat as many times as necessary.
- If you choose a multiple or single choice field, enter the values (i.e., the different answer options). Remember to separate them with a vertical bar ( | ) and do not leave any spaces. Example: Yes|No|Maybe. This field won’t appear for types that don’t require it (e.g., Text field, Text area).
Step 3.
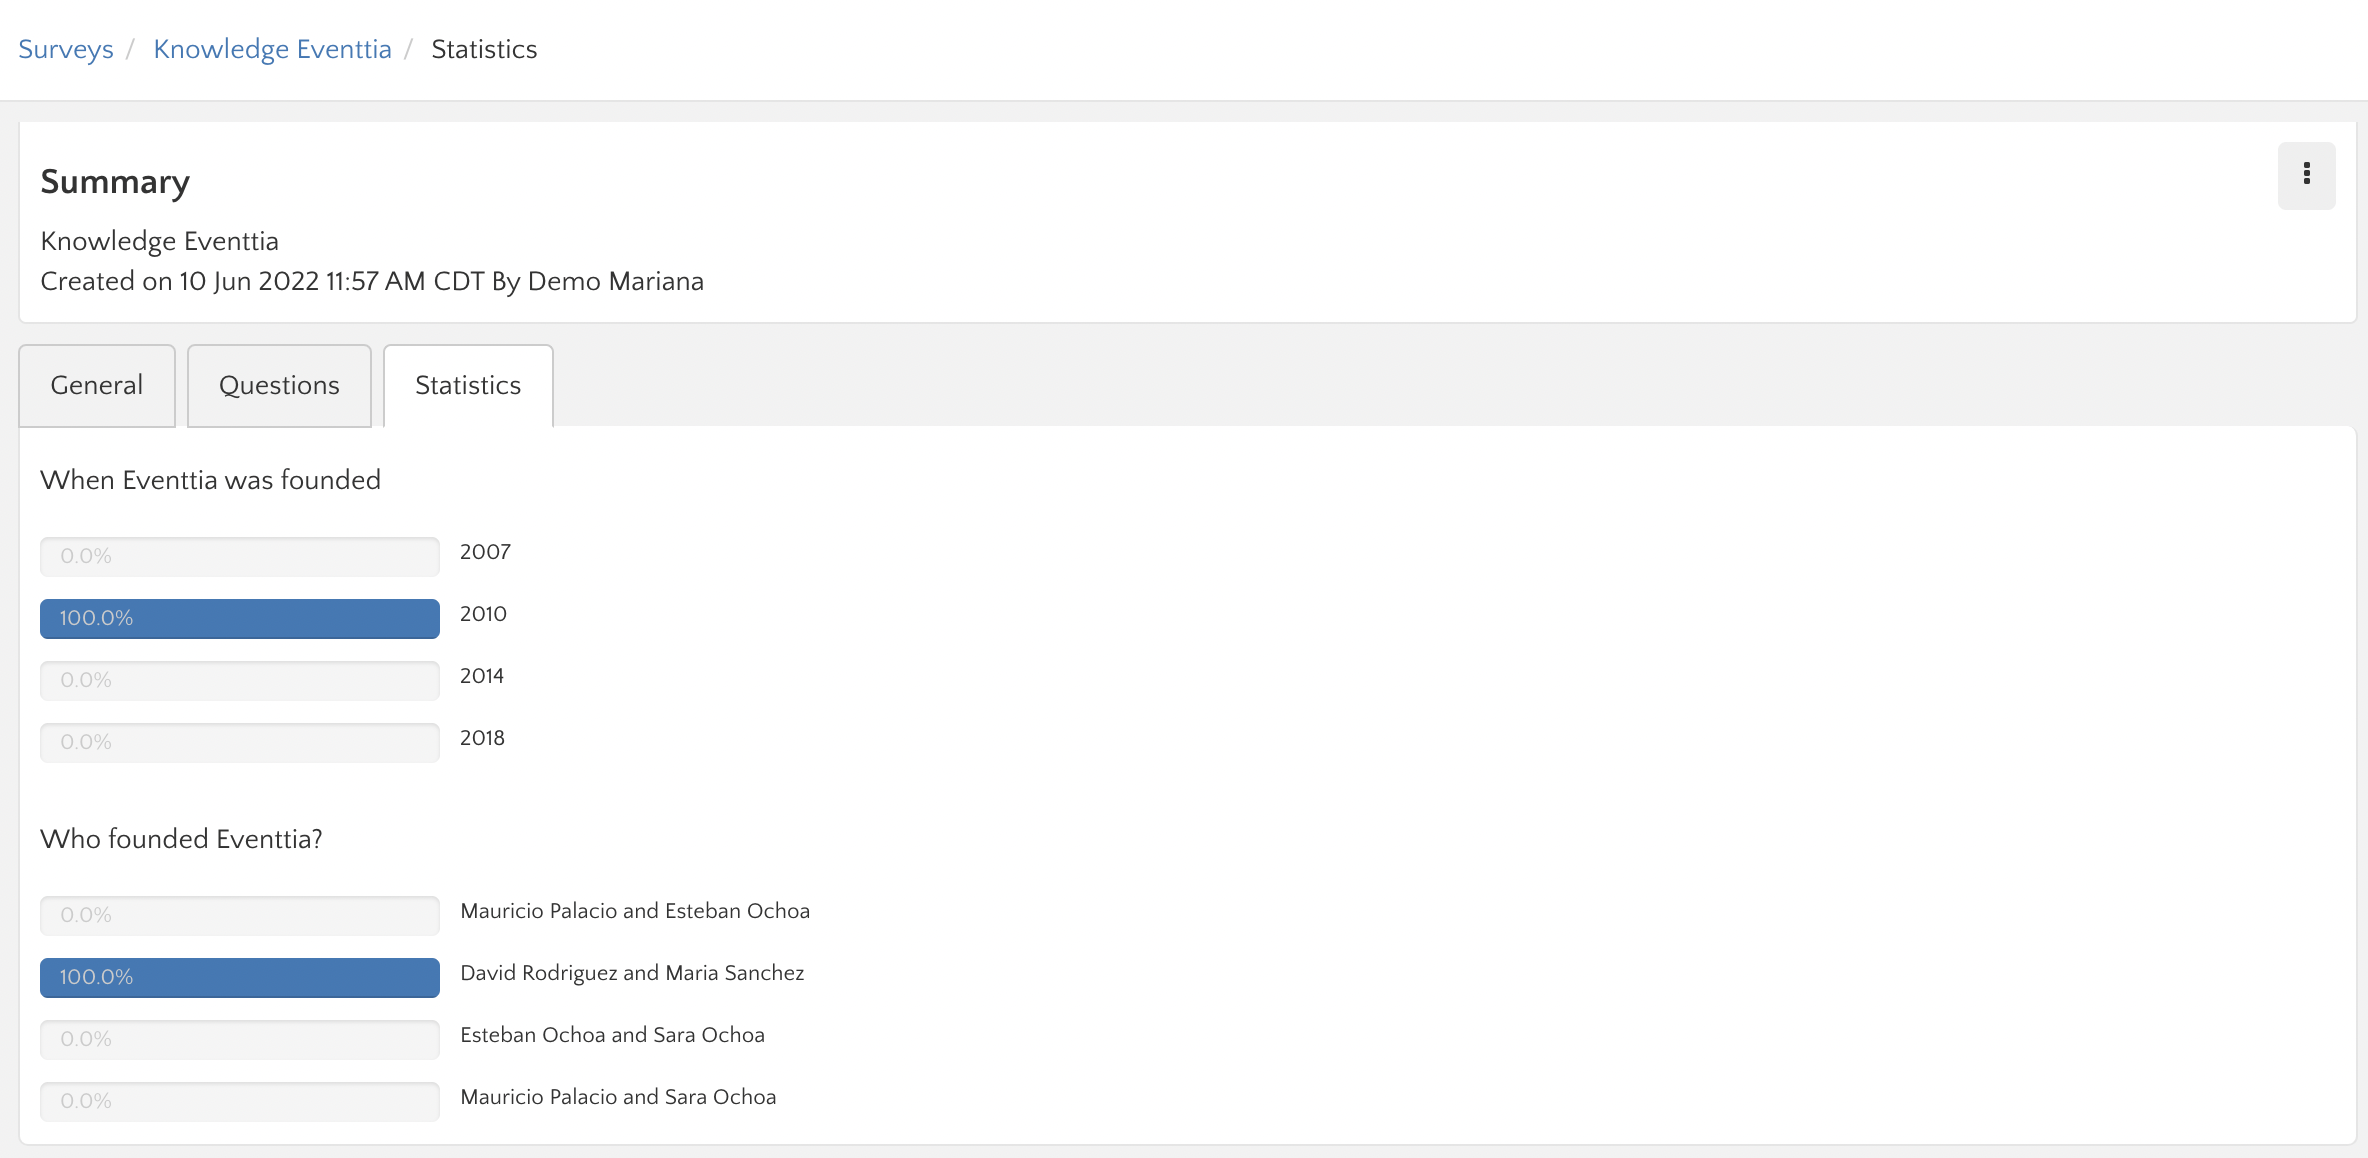
- Once your questionnaire has at least one question, a "Statistics" tab appears, giving you access to the results of each question (in percentage).
This information will only be generated when at least one response is received.
- To download the Survey report go to the three dots and then "Download Survey Results". You can also view results on a new page, download file downloads log or delete.
