The Networking profiles also allow you to define which attendee types are allowed to meet with each other, or which attendee types can send a meeting request and which ones cannot. Discover in this article how to create networking profiles.
Step 1:
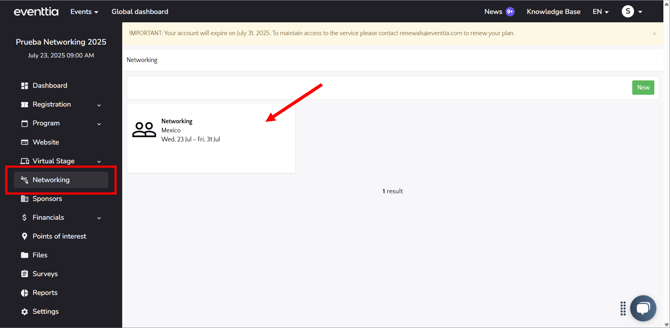
- Go to the "Networking" module and enter the Networking session.
Step 2:
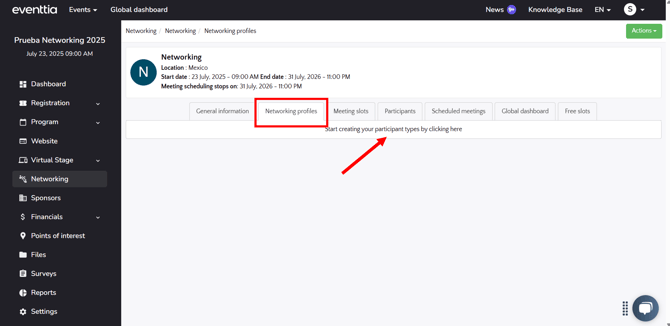
- Enter the "Networking Profiles" tab, then click on "Start creating your participant types by clicking here" link.
- Then, in the General information tab, fill in the details of the Networking profile you are creating:
- Name of the profile (eg Seller)
- Can block time slots: This option allows the participants to indicate slots of non-availability
- Cancel meetings: This option allows the participants to cancel confirmed meetings
- Schedule restrictions: Automatically blocks time slots that are already booked for other activities from the program
-
- Attendee types: This is where you can select the attendee types of the event to link to this Networking profile. eg Participants and VIPs for a Buyer profile and Exhibitors for a Seller profile)
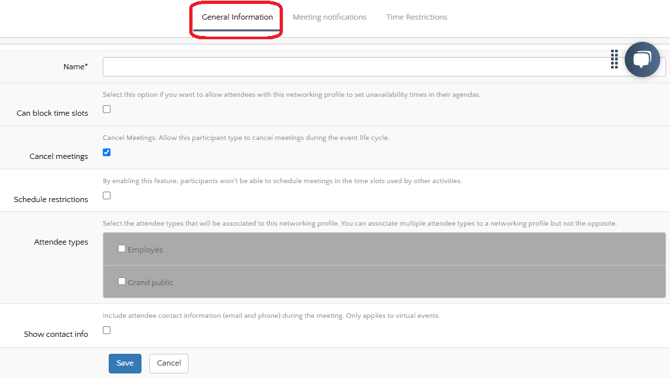
- Click on Save once all the settings are correctly set up.
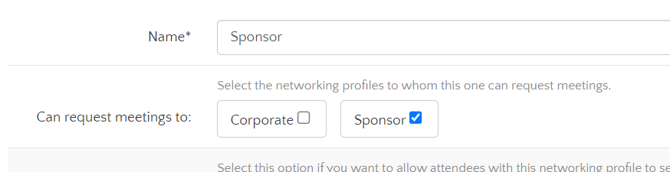
- After saving, you will see a new option that allows you to define to which other networking profile is the one you are editing allowed to send meeting requests to.
- If it's the first one you create, you'll only see this networking profile, but once you have created other Networking profiles, you can go back here and select the right Neworking profiles that can meet with the first one.
Step 3 :
- After the General information of the Networking profile, you can move to the next tab called Meeting notifications.
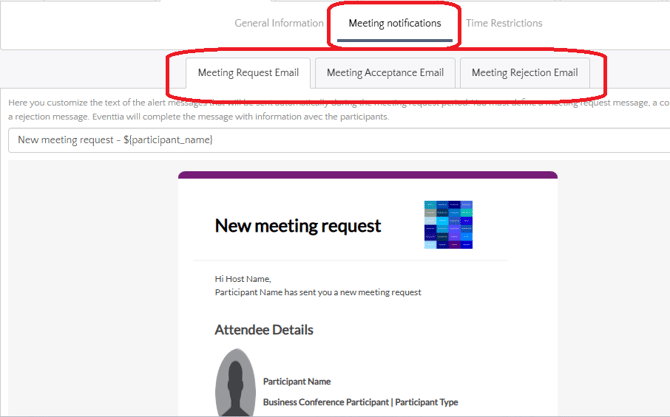
In this tab, you have three types of notifications:
- Meeting request email
- Meeting acceptance email
- Meeting rejection email
By default, you'll be able to edit only the Subject of those emails. But if you want more freedom on the customization of those notifications, you can reach out to help@eventtia.com or use the Chatbox to ask the Support team to activate blank templates for those emails.
Step 4 :
- After the notifications, you can move on to the Time restrictions tab. In this tab, you'll be able to block time slots for all the participants. An option very useful for example for lunch break for example.
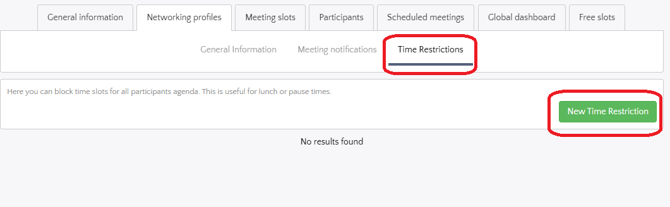
And in order to block such time slots:
- Click on the Green button New Time restriction and add the start and end date of the slot to block.
- Click on Save to save the blocked time slot.
Check the following articles for the next steps:
Step 3 : How to set up meeting slots for your networking session
Step 4 : How to assign locations to attendees of your networking session (optional)
Step 5 : How to set up meeting rejection reasons and expiration rules (recommended)
Step 6 : How to verify the networking session before launching it (recommended)