Here's how to connect Eventtia with PayU:
Step 1.
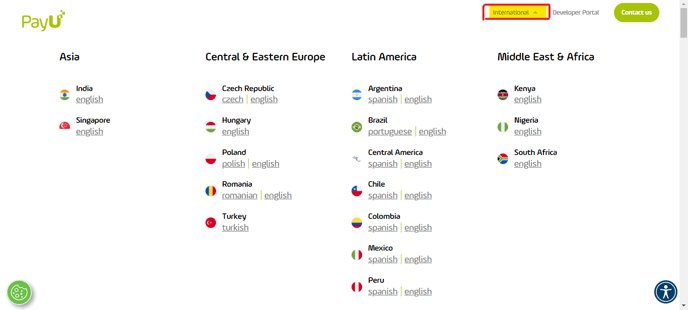
- Click on this link to choose your region and log in with your PayU account.
Step 2.
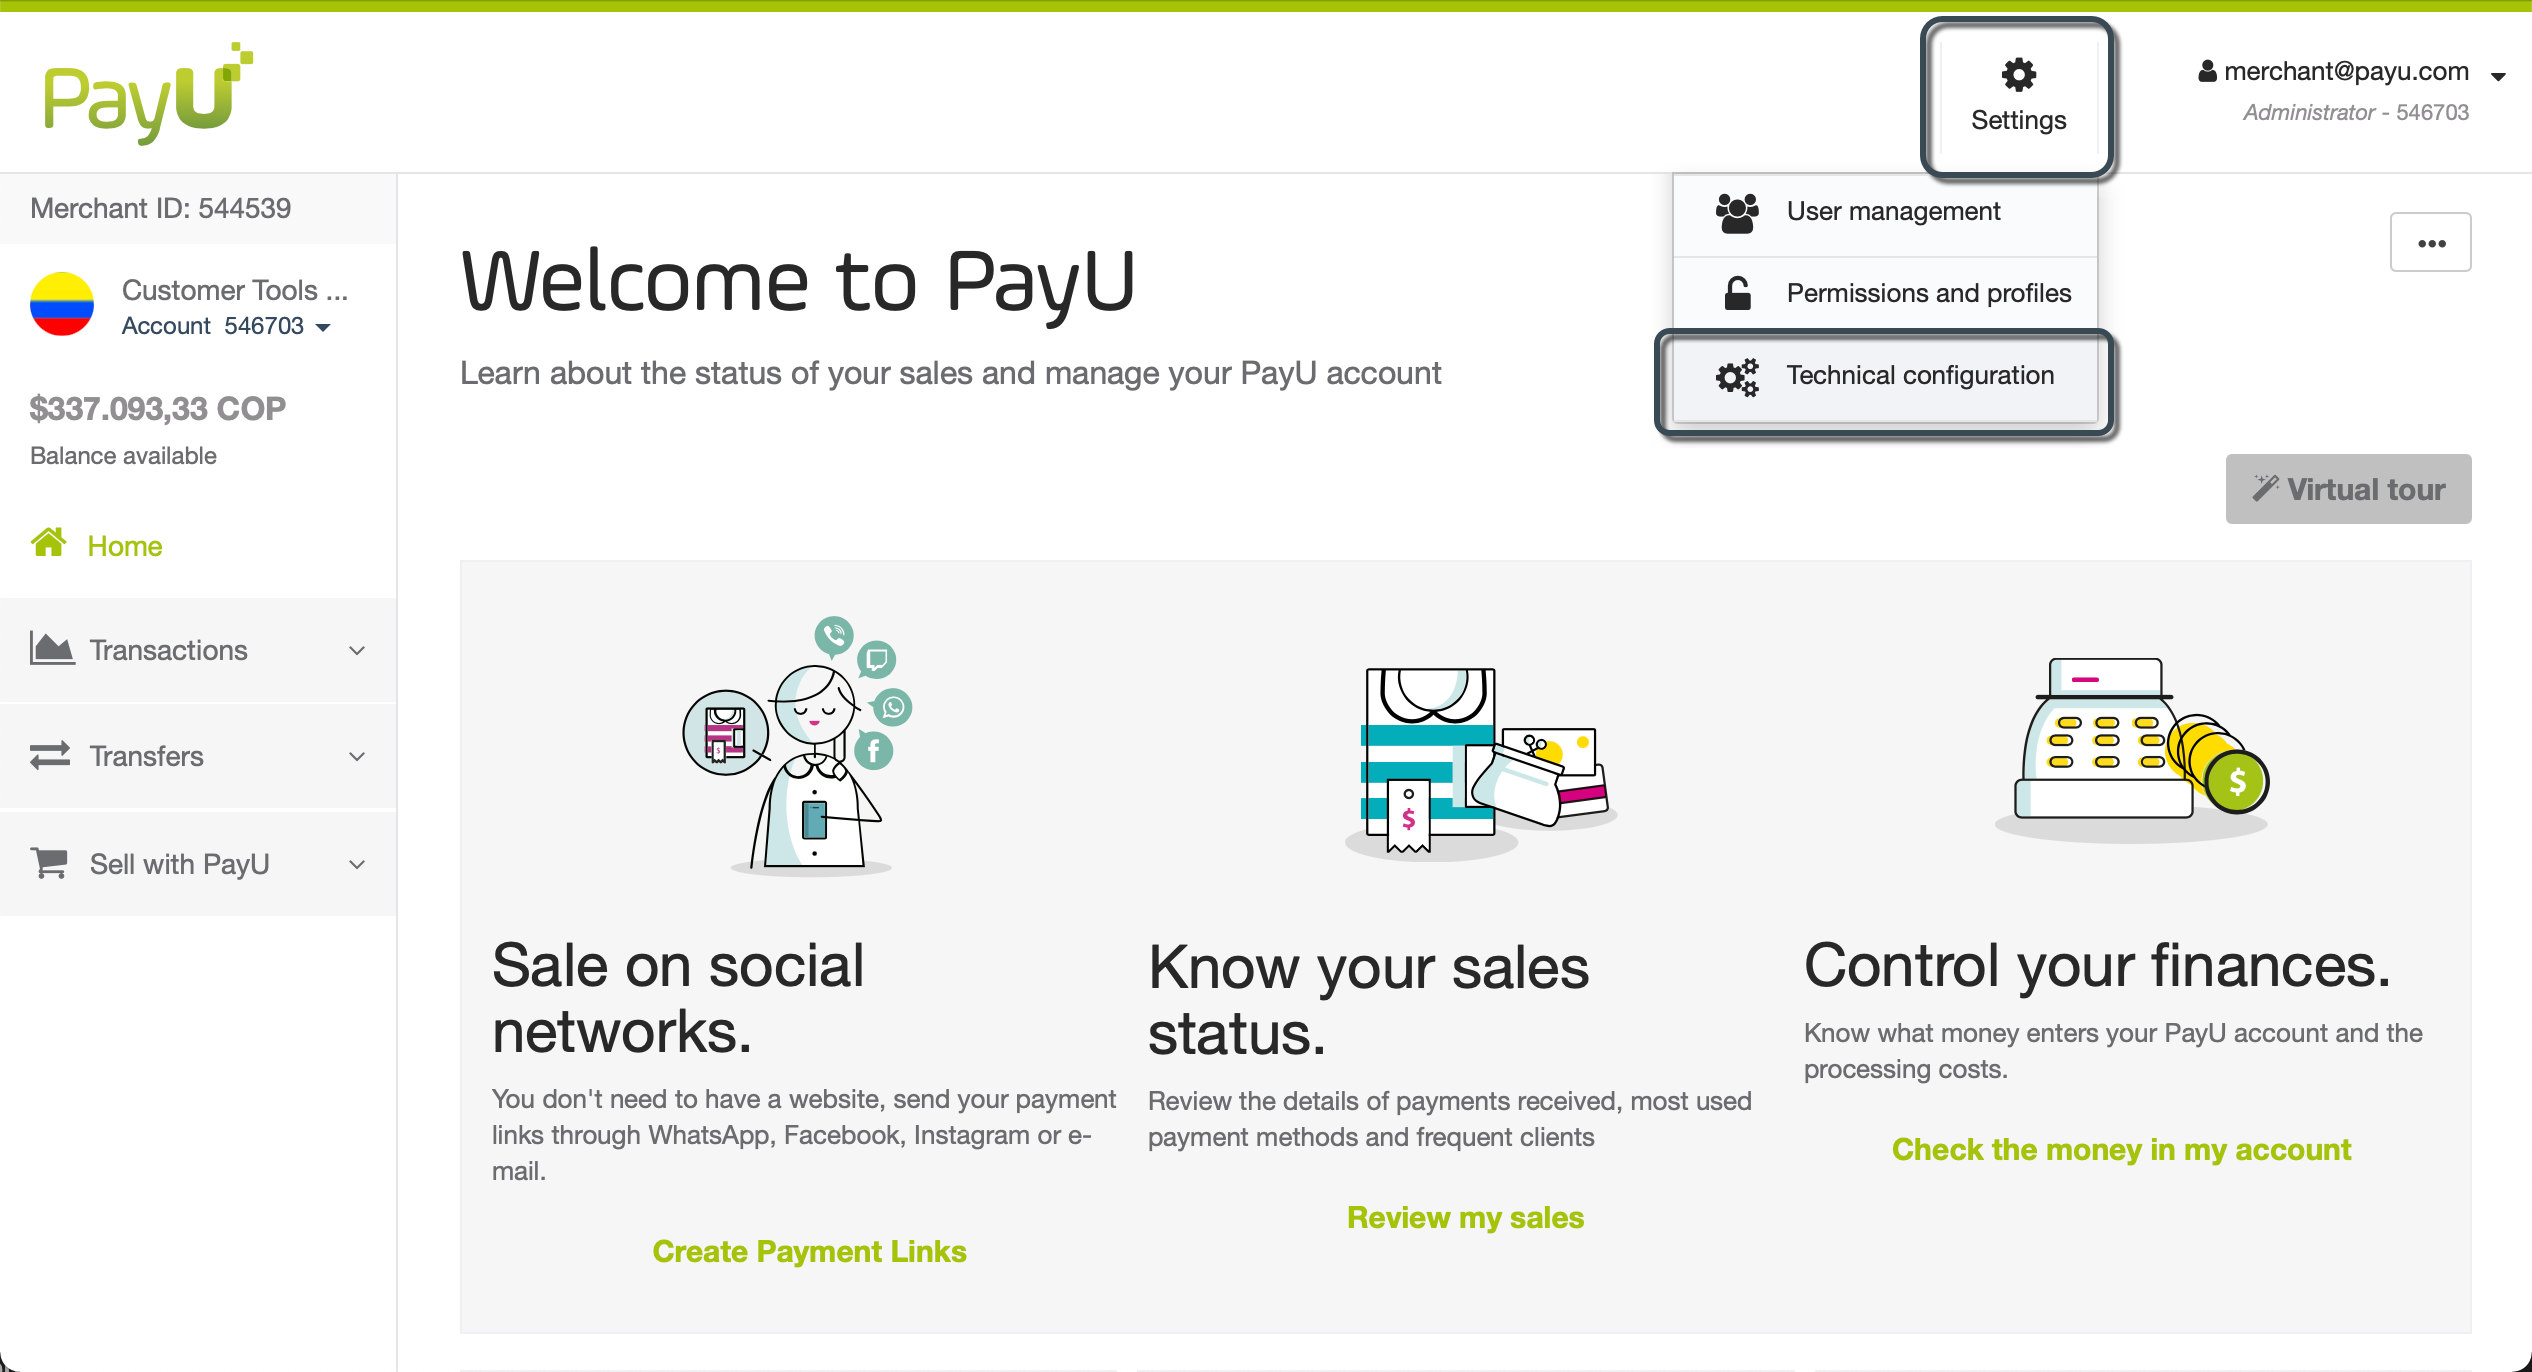
- In the PayU module, click Settings and then select Technical configuration.
- In this window, you find both the API key and API Login, copy those values individually.
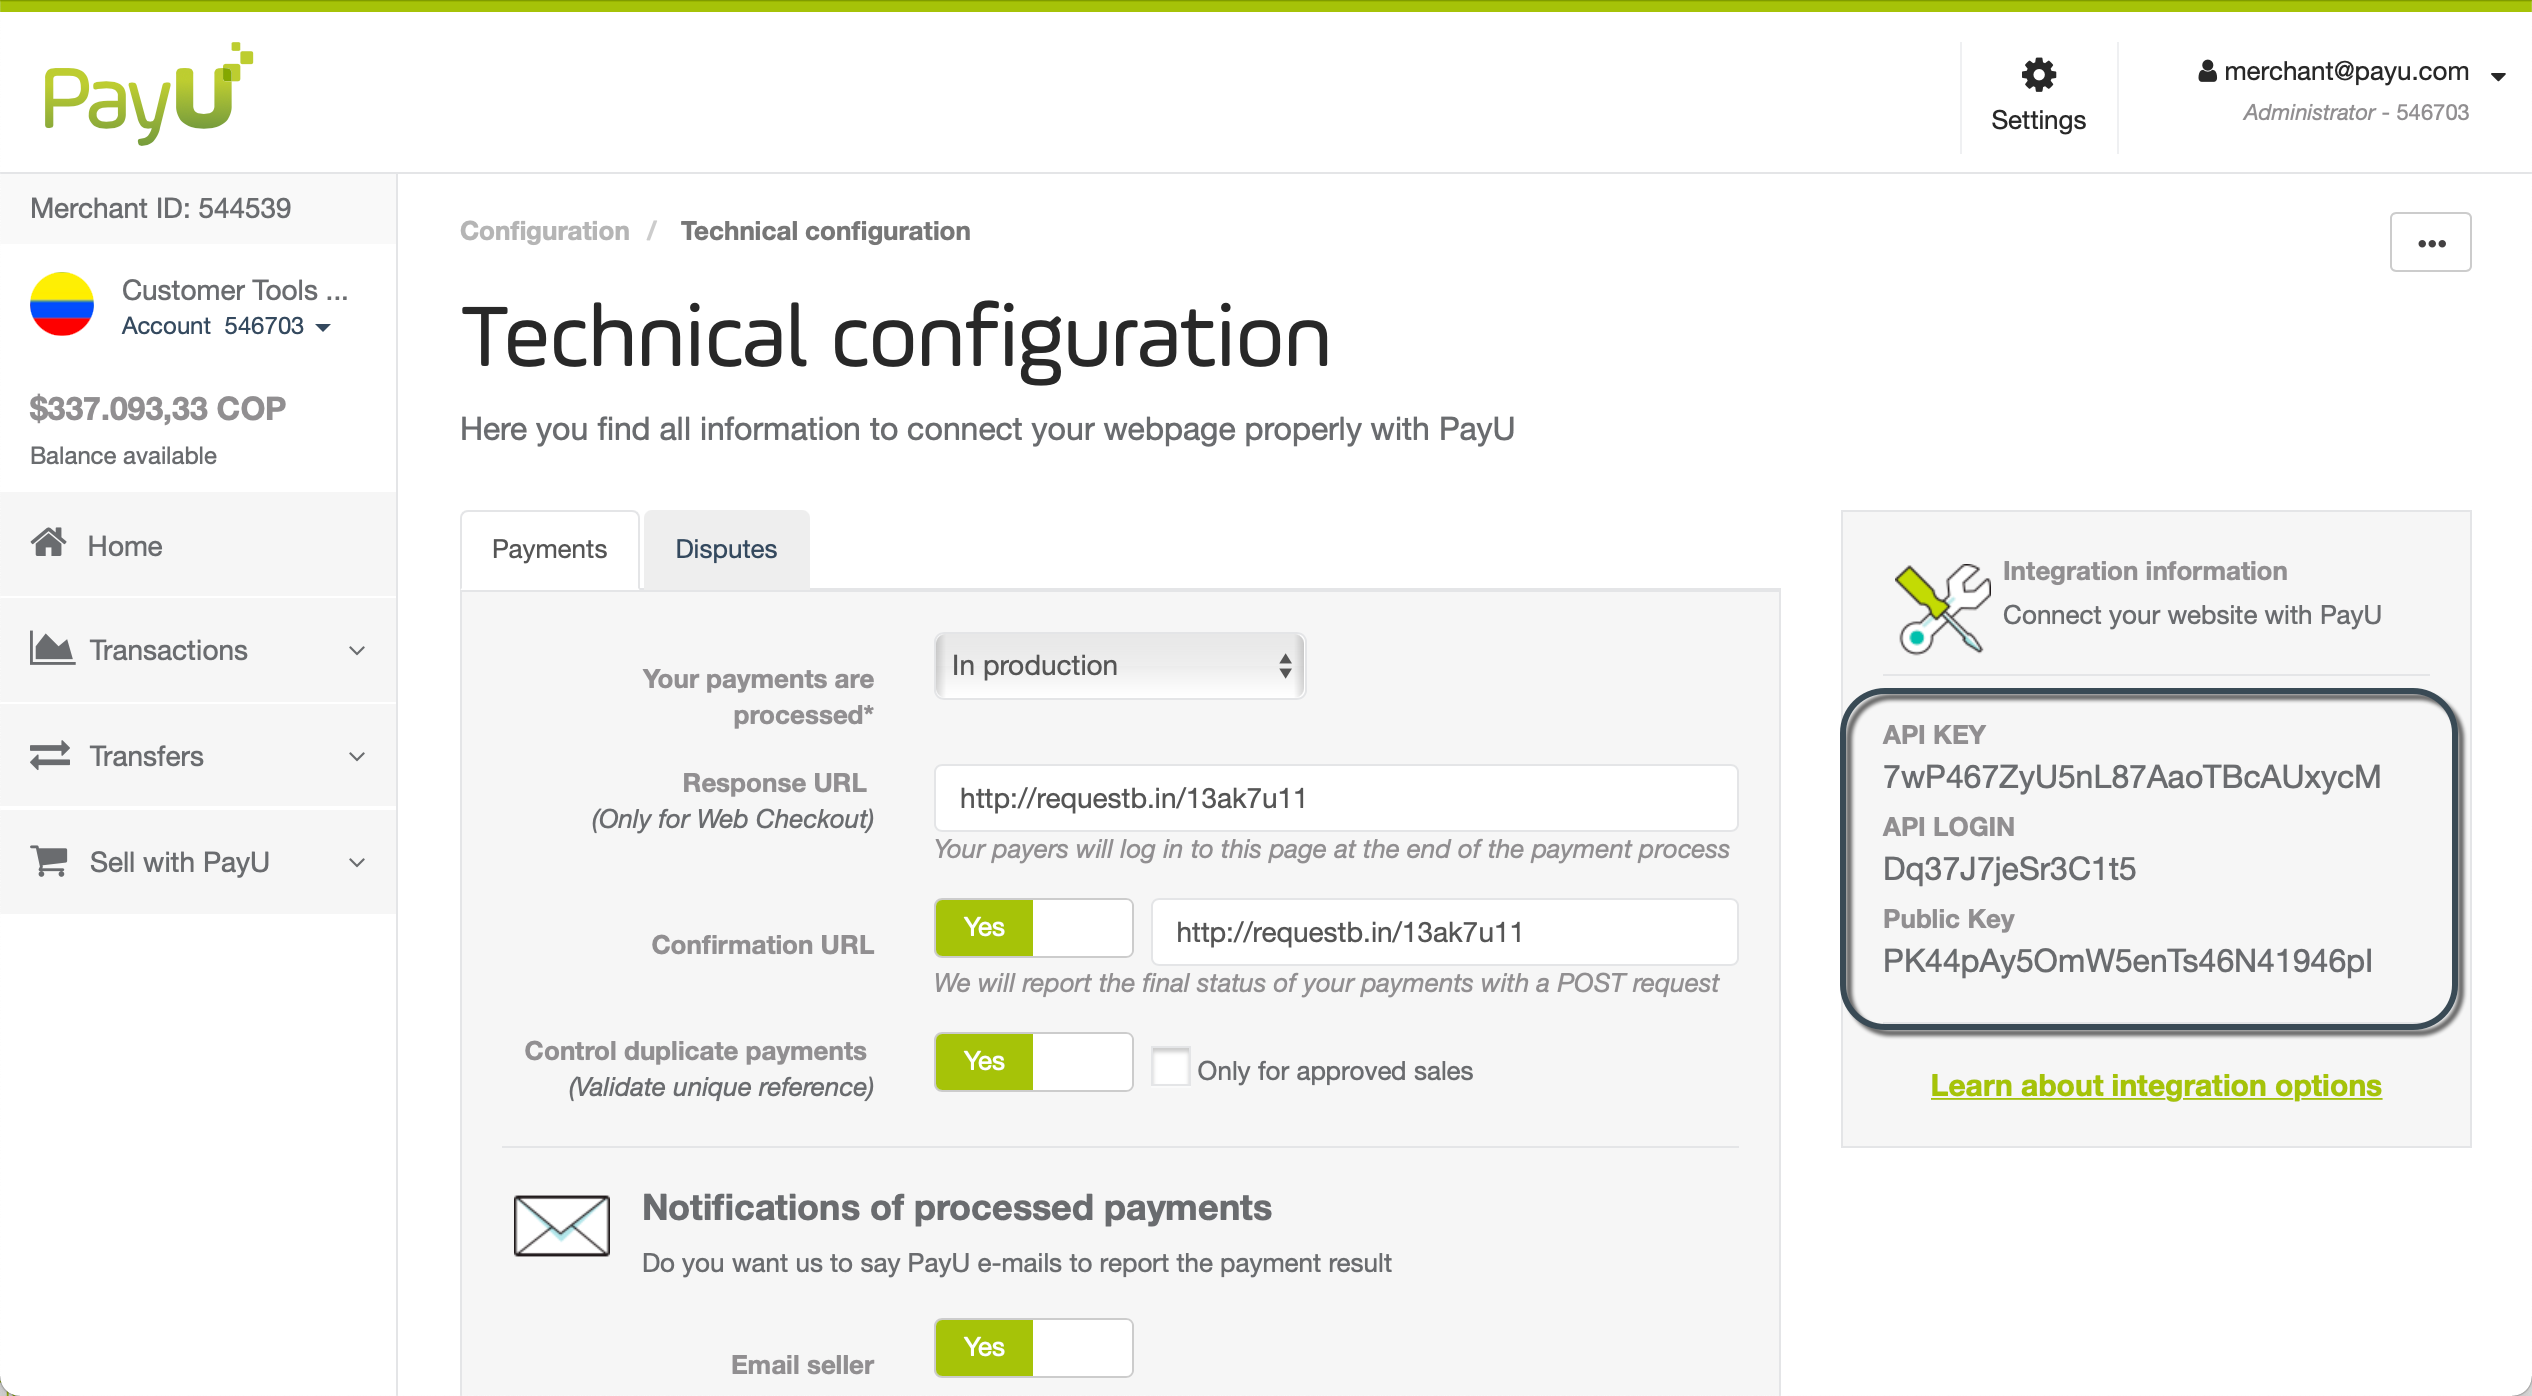
- And paste each one in the "Api key" and "Api login" box of your Eventtia account.


- When you log in your PayU module, both Merchant and account ID values are accessible in the left panel. Copy those values individually.
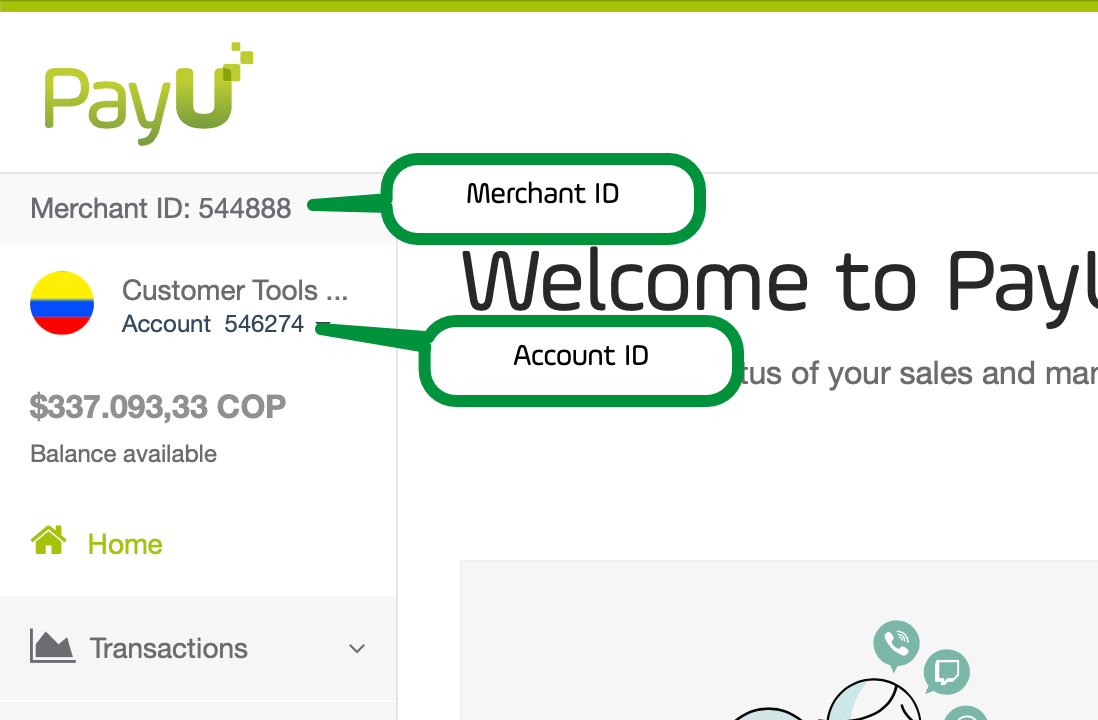
- And paste each one in the "Merchant id" and "Account id" box of your Eventtia account.

- Please don't forget to "save" once you are done.