Discover below how to use the Networking dashboard.
Step 1
To access the Networking dashboard,- Enter the Networking module of your event
- and access the Networking session.
- There, move to the Global Dashboard tab

Step 2
-
Once within the Global Dashboard tab, you can filter by Company, Attendee types or by days of the networking session.
In the example below,
- We are filtering by attendee type and a day:
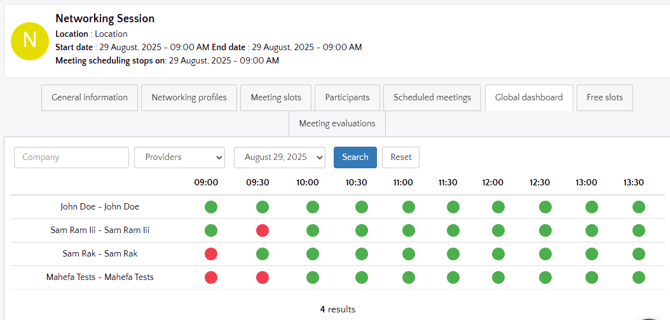
- This will display all the attendees of this type and all the slots created for the selected day.
- The green dots indicate that the participants are available during the time slots
- The red dots indicate that the participants are busy during the time slots, with pending or already confirmed meeting.
Step 3
You can manage the participant's agenda in a more global way with the Global Dashboard.
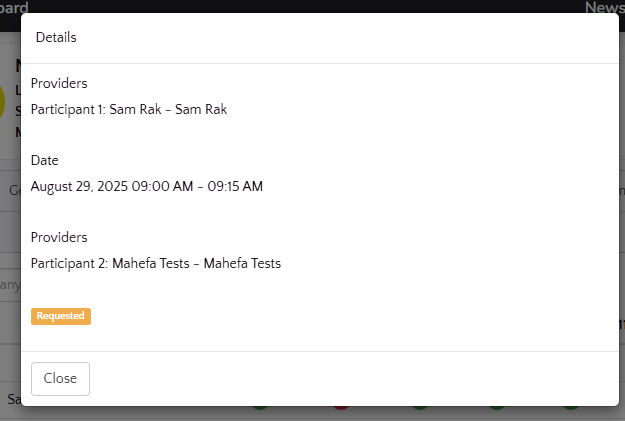
- If you click on the red dots, you will see the meeting pending for confirmation or already confirmed for the selected slot
- If you click on a Green dot, you can plan a meeting for the participant
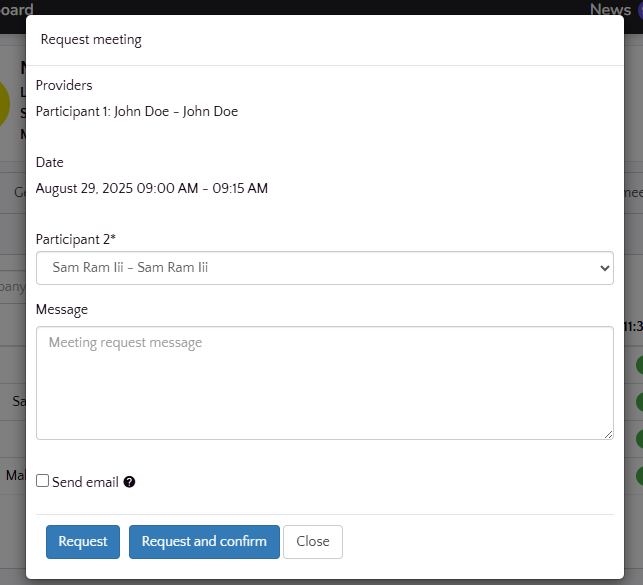
- There, you can select the attendee you want to plan a meeting with the selected participants,
- Check the box for Send email to send an email notification
- Then, send the Request or send the request and confirm directly with the Request and confirm button.
With the Global dashboard, you have the possibility to manage easily the attendees networking. This can be very useful, especially for events where the organizers also manage some participants' agenda, like VIPs for example.