Step 1: Choose and copy the corresponding CSS code
We have created several small pieces of code for you, corresponding to different parts of the form and the registration summary page. Select them by clicking on them.
Then, "Copy" the code provided in the green box and click on "Click here for the next step."
Registration form:
Registration summary page:
- Change the Background Color of the Successful Registration Message
- Main Button
- Event Title – Side Border Style
- Calendar button – Add to calendar
Step 2: Create your CSS file
CSS allows you to modify the appearance of various elements of your registration form, such as colors, borders, or typography.
To create it, follow these steps :
- Open a text editor on your PC:
- For Windows: Use Notepad.
- For Mac: Use TextEdit. Then, switch to Plain Text (Click on Format > Select Convert to Plain Text (Shortcut: ⇧⌘T)).
- Paste the code you copied in Step 1
- Save and name the file with the extension ".css" (Example: style.css)
Note: If you need to customize multiple sections of the form and summary page, simply put the different codes in a single CSS file.
Step 3: Insert your CSS file on Eventtia
- Once your file has been created, go to Eventtia in the "Registration" module, then "Advanced settings."
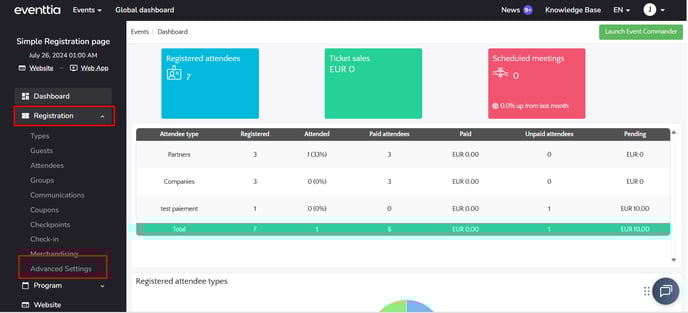
- Scroll down to the section "Customize the registration form with CSS and JavaScript files," then insert the CSS file created in step 2:
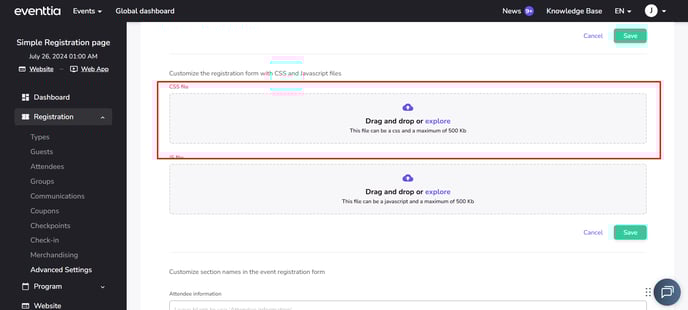
- Then click on Save.
Now you know how to customize your registration form to match your brand.
Change the Style of the Main "Save" Button
Change the appearance of validation buttons (such as the "Save" or "Next" button).
.main-card button,
input.btn {
background-color: #ffffff; /* Background color (White) */
line-height: 2;
border-radius: 20px; /* Rounded shape*/
padding: 6px 24px;
margin: 0 0 8px 8px;
}
/* Button style on mouseover */
.main-card button:hover,
input.btn:hover {
background-color: #ffffff; /*Background color on hover (White) */
}
Click here for the next step
Back to the code list
Customize Colors for Activity Selection (Workshops)
Set the primary color used to highlight activities. (Change the color #4a90e2 to your primary color).
.workshop__date--selected {
background-color: #000000 !important; /* Background of the selected date */
color: white; /* Text for the selected date */
}
.workshop__time--selected {
color: #4a90e2 !important; /* Texte de l'heure sélectionnée */
border: 2px solid #4a90e2 !important; /* Border of the selected hour */
}
.workshop__date.workshop__date--selected {
background-color: #4a90e2 !important; /* Background of the selected date (bis) */
}
.workshop__content {
border-left: 5px solid #4a90e2 !important; /* Side border of the activity */
}
/* Flèches de navigation pour les horaires et les dates */
.workshop__times-row .times__btn-left-scroll.btn-scroll,
.workshop__times-row .times__btn-right-scroll.btn-scroll,
.workshop__dates-row .dates__btn-right-scroll.btn-scroll,
.workshop__dates-row .dates__btn-left-scroll.btn-scroll {
color: #4a90e2; /* Color of arrows */
}
Click here for the next step
Back to the code list
Change the Background Color of the Successful Registration Message
.attendee-success-message {
background-color: #ffffff !important; /* Change the green background to white */
}
Click here for the next step
Back to the code list
Main Button:
(Change the color #003c78 to your main color)
.btn-primary-action {
background-color: #003c78;
}
.btn-primary-action:hover {
background-color: #003c78;
}
Click here for the next step
Back to the code list
Event Title – Side Border Style:
(Change the color #003c78 to your main color)
.header-registration .event-title {
width: 250px;
margin-left: 20px;
padding: 0 30px;
color: #003c78;
border-left: 1px solid #003c78;
font-weight: bold;
font-size: 18px;
line-height: 1.2;
}
.header-registration i {
color: #003c78;
}
Click here for the next step
Back to the code list
Calendar button – Add to calendar:
(Change the color #003c78 to your main color)
.btn-calendar {
padding: 0 20px;
height: 30px;
display: inline-block;
position: relative;
margin-top: 5px;
border: 2px solid #003c78;
background-color: white;
color: #003c78;
border-radius: 12px;
transition: all 0.2s ease-in-out;
font-size: 14px;
font-weight: bold;
}