By reading the following steps, you will learn how to set meeting rejection reasons and how to define a timeline to answer a meeting request.
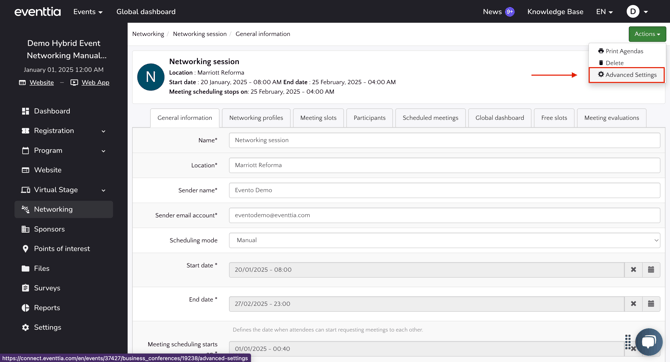
Step 1.
- Go to the "Networking" module.

- Select the Networking session you want to program.
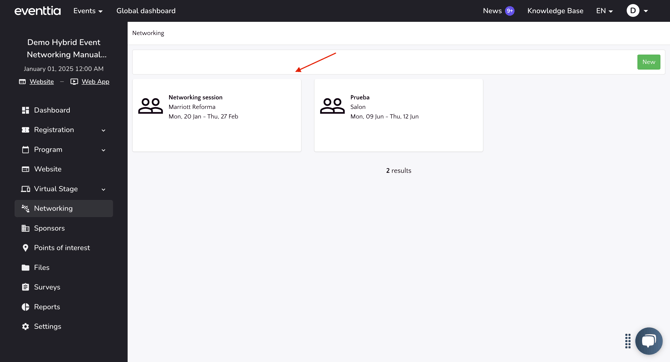
- Then click on Actions button on the top right-hand corner and select Advanced Settings
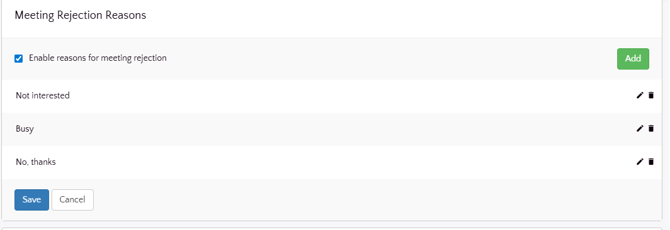
Step 2.
- The section Meeting rejection reasons allows you to configure meeting rejection reasons. If you check the box Enable reasons for meeting rejection, and then click on Add on the right, you can register as many rejection reasons as you want. In the screenshot below, you will see examples of rejection reasons: "not interested", "busy", "no, thanks". Feel free to customize them according to your own ideas!
Step 3.
- In the section Meeting Expiration, you will be able to set up meeting expiration by selecting Auto expire meetings that have not been responded within and setting up the number of days you want the meeting request to be ongoing.
- For example, if you select "1 day", it means that after 24 hours without an answer, the meeting requests will expire and attendees will need to create a new request. You can select up to 8 days for an attendee to answer a meeting request.
If you do not want to set a meeting expiration, just leave the box unchecked. - Then select the networking profile to which you want to apply this meeting expirations.

Check the following articles for the next step:
Step 6 : How to verify the networking session before launching it (recommended)