Discover in this article the steps about how to assign fixed locations to your participants:
Step 1. Number of meetings per slot
- Enter the Networking module and access your Networking session.
%201.56.41%20p.m..png?width=670&height=281&name=Captura%20de%20pantalla%202025-07-21%20a%20la(s)%201.56.41%20p.m..png)
- Then, within the Networking session, click on Actions on the top right and select Advanced Settings.
%201.57.22%20p.m..png?width=666&height=381&name=Captura%20de%20pantalla%202025-07-21%20a%20la(s)%201.57.22%20p.m..png)
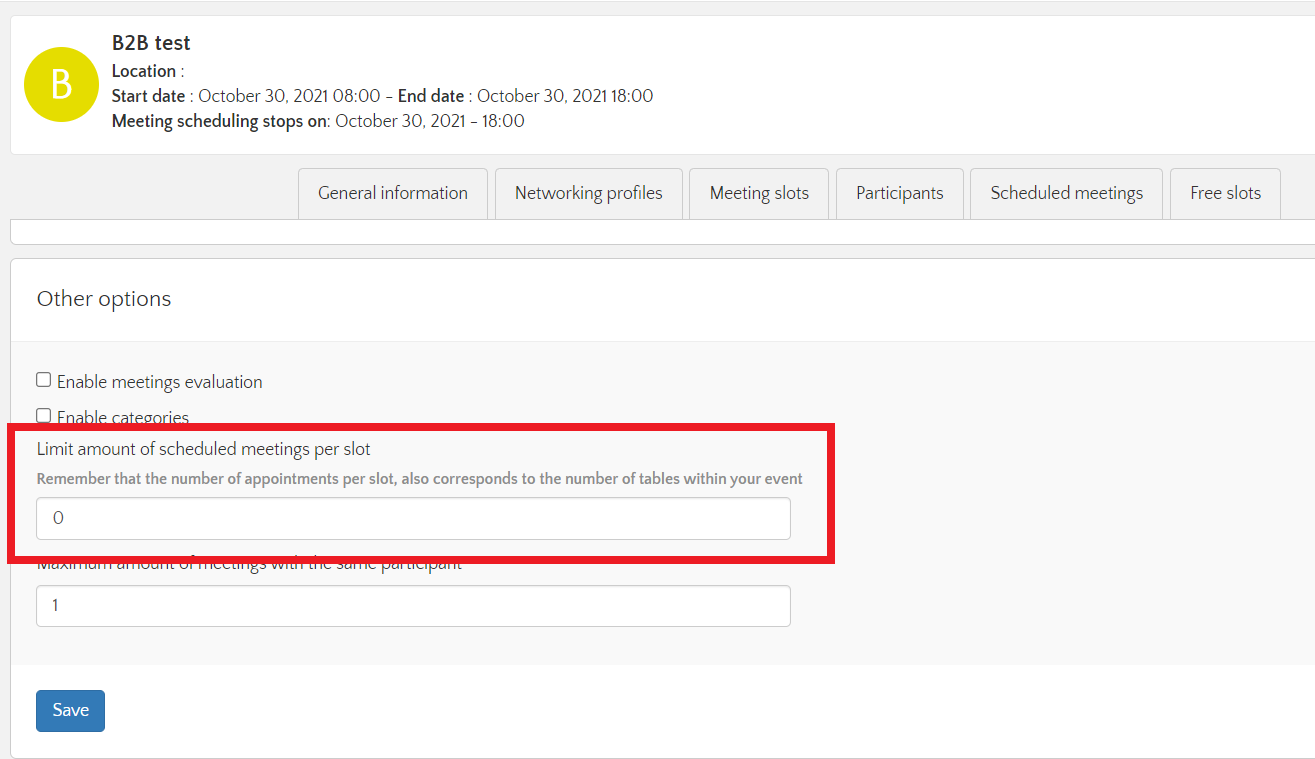
- Go to Limit amount of scheduled meetings per slot part, in the first section Other options, and specify how many meetings can take place in any given slot (i.e. how many locations you have available). Don't forget to hit Save once it's Ok.
Step 2. Meeting locations
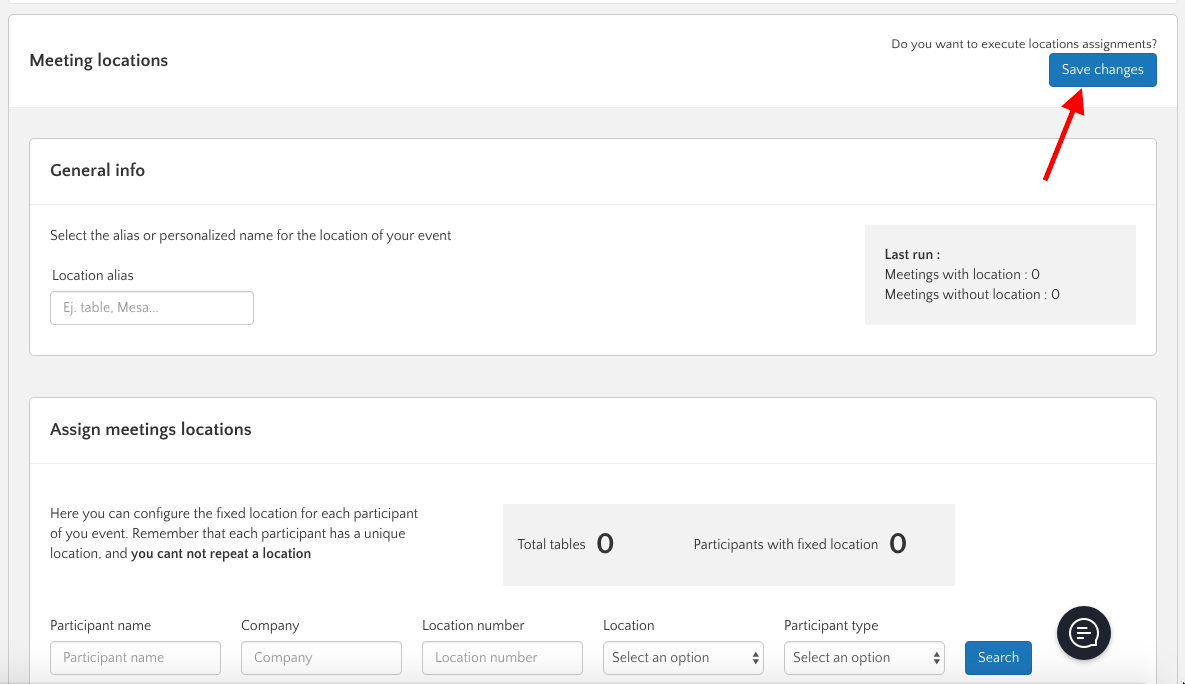
- In the Advanced settings page, scroll down until you see the Meeting locations section.
- There, check the box for Enable meeting locations and click on Setup.

- It is now time to assign tables to your attendees. Assigning tables means allocating them a fixed location for the whole networking session (i.e. Fixed tables or stands).
- You can edit the location alias, if you want to personalize the name for the location of your event. This location alias can be for example "Table" or "Stand" and will be combined with a number to determine an allocation reference.
%202.00.05%20p.m..png?width=670&height=313&name=Captura%20de%20pantalla%202025-07-21%20a%20la(s)%202.00.05%20p.m..png)
- In the Assign meetings locations section, you can search for participants and assign them a fixed location. If you assign a location to a participant, they will have all their meetings at that fixed location.
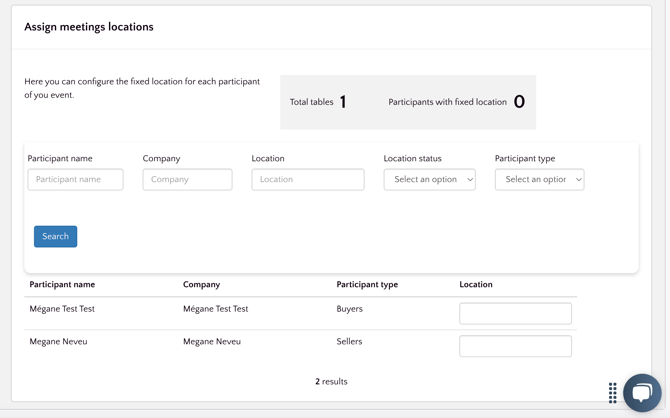
- Once you have selected an attendee, you just need to fill in the location box indicated by the red arrow. You can use a mixture of numbers and letters, e.g. Table 1.
- For example, if you write 1 in the location box for the first attendee, Megane Test test, she will be assigned to location 1 automatically for all the meetings she has. She will stay in this fixed, selected location for the whole networking session.
- On the other hand, if you do not fill in the Location box, a random table will be assigned automatically to all the other attendees.
- If you number your locations, make sure to do so in a full sequence, without missing out any numbers.

- Once you have defined a location for the selected attendees, do not forget to click on Save changes. By clicking this box, you will confirm your manual allocation and start the random assignation process for the rest of the attendees.
Step 3. Final check
- Finally, you can check if your assignment has been effective using the Participants tab of the Networking session. You will see the name of the attendee with their fixed location previously set up.
- In the example below, we can see that Megane test test is assigned to table 1, as selected in the previous section.

NB : If two participants with fixed location send each other receive a meeting request, the one who receive the invitation has to go to the table of the one who have sent the invitation.
Check the following articles for the next steps:
Step 5 : How to set up meeting rejection reasons and expiration rules (recommended)
Step 6 : How to verify the networking session before launching it (recommended)