When you enable group registration, it allows your attendees to register once, enlisting at the same time their co-workers, friends or family members. One of the main benefits of this is that the attendee will be able to pay for the whole group with just one transaction.
Here's how to enable it:
Step 1.
- Go to the "Registration" module and click "Types".
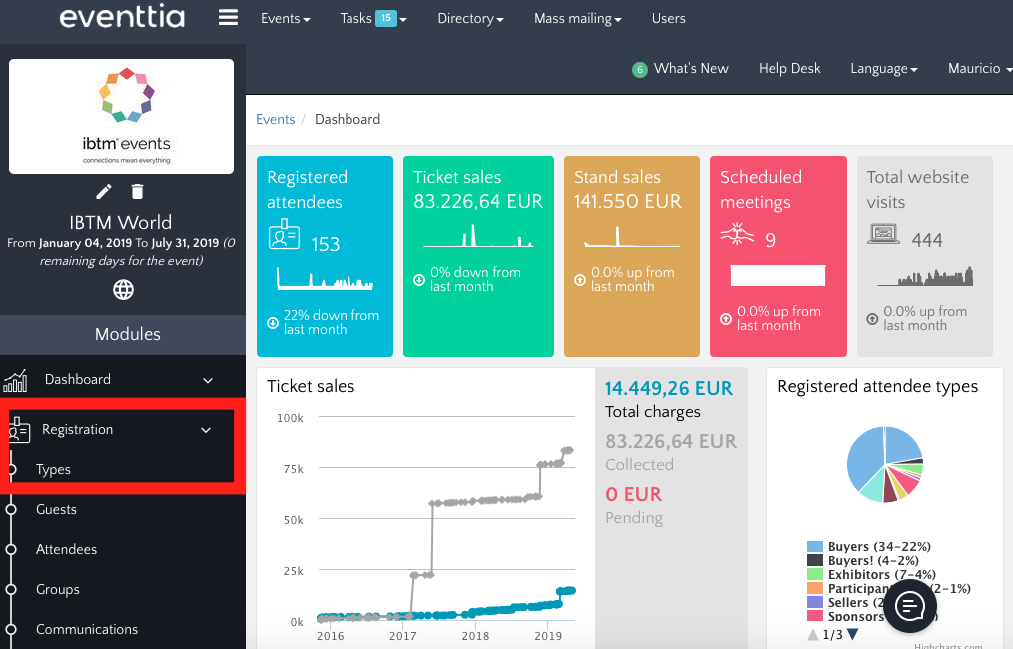
Step 2.
- Choose an attendee type and click on its card.
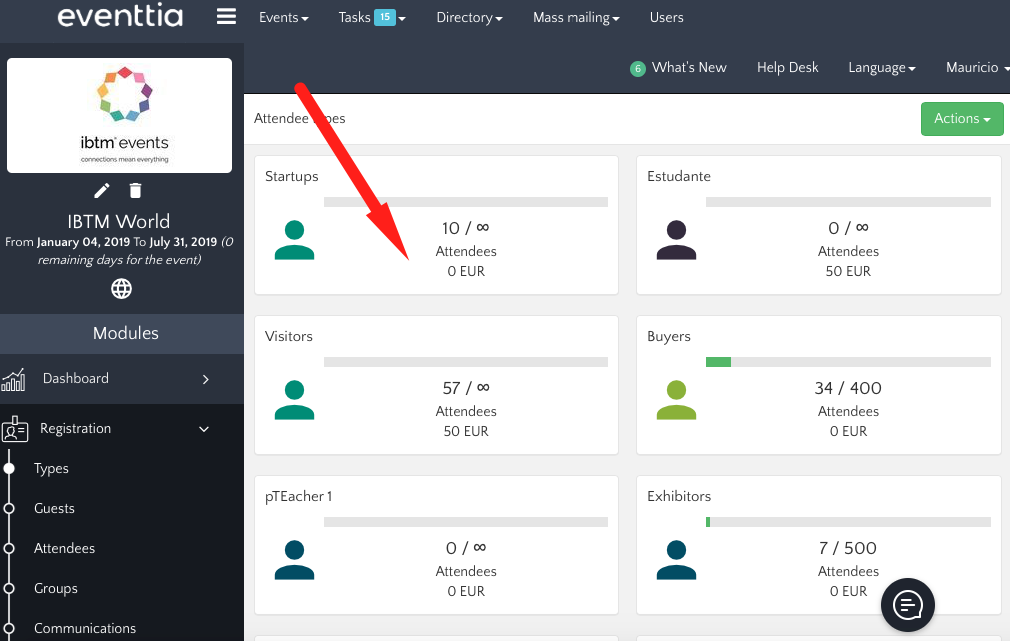 Step 3.
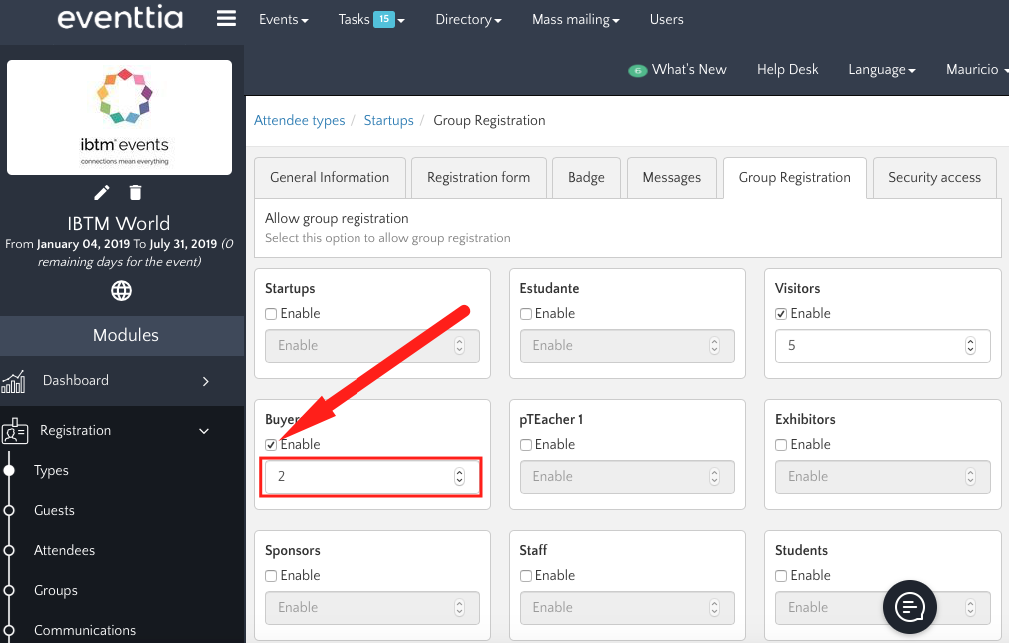
- Go to the "Group Registration" tab.
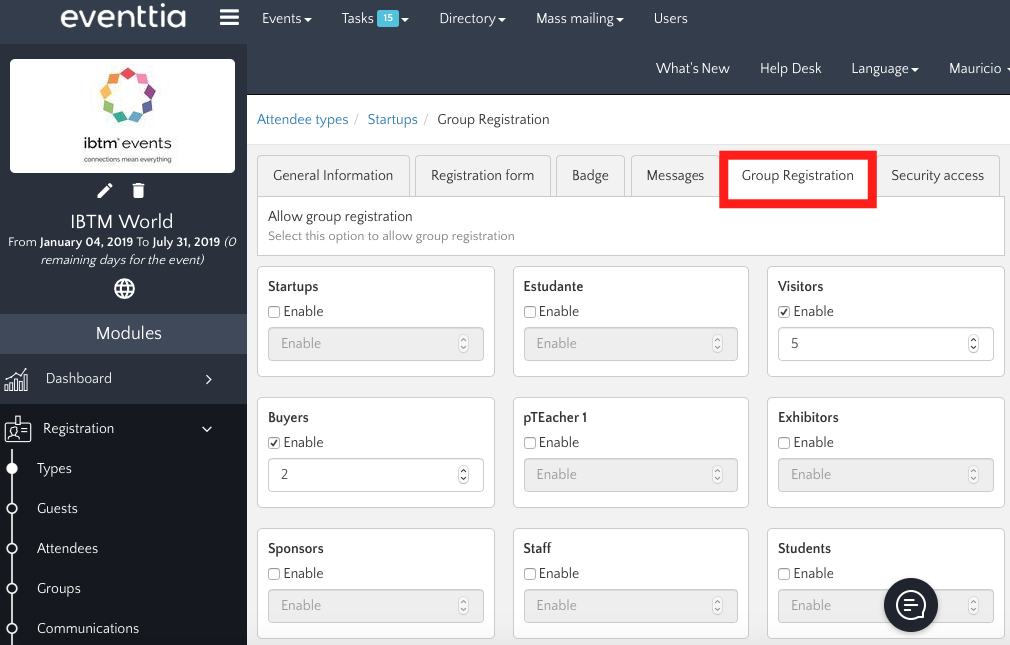 Step 4.
- Decide which attendee type will have access to the "Group Registration" option by ticking the "Enable" box on the chosen participant types.
- You can settle a maximum amount of people per group into the box right below
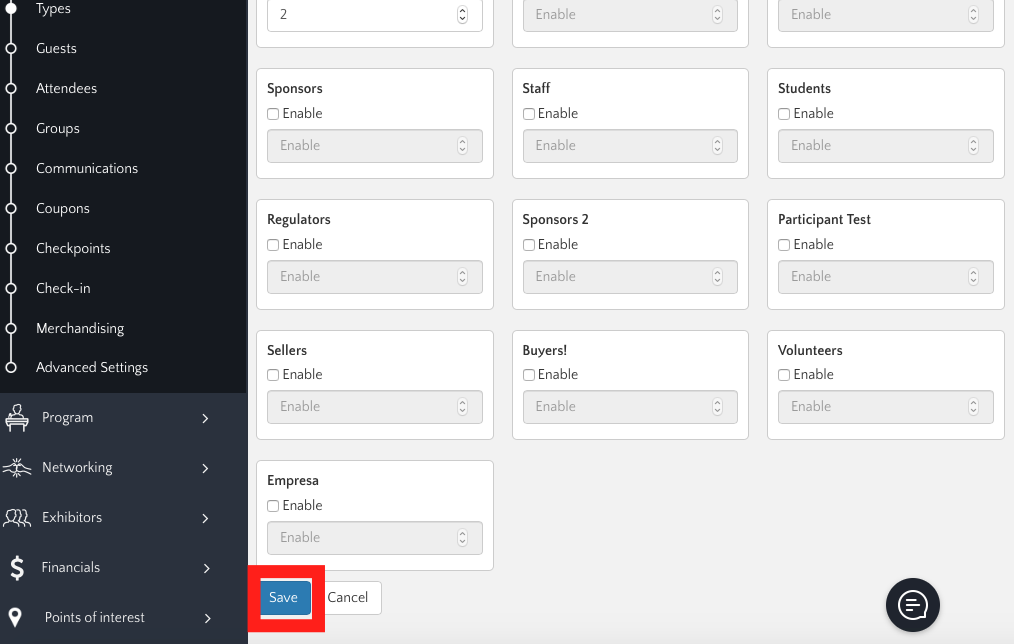
- Once it is done, do not forget to "Save".
Step 5.
- Once you have enabled group registration, your attendees will be able to register multiple people, up to the maximum you established in Step 4.
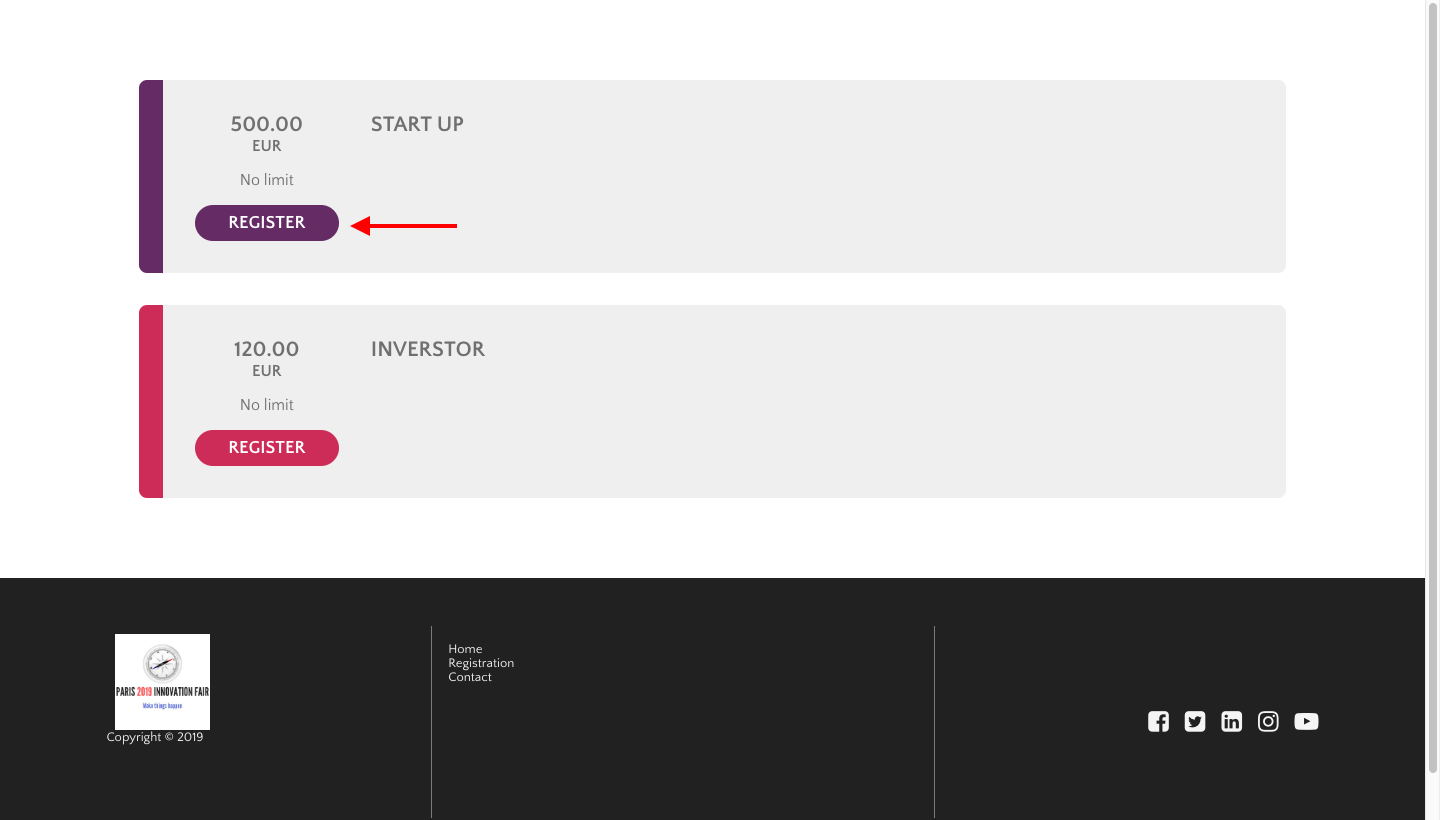
- To do this, they should go to the registration section of your website, and click "Register" for the type of participant to which they belong.
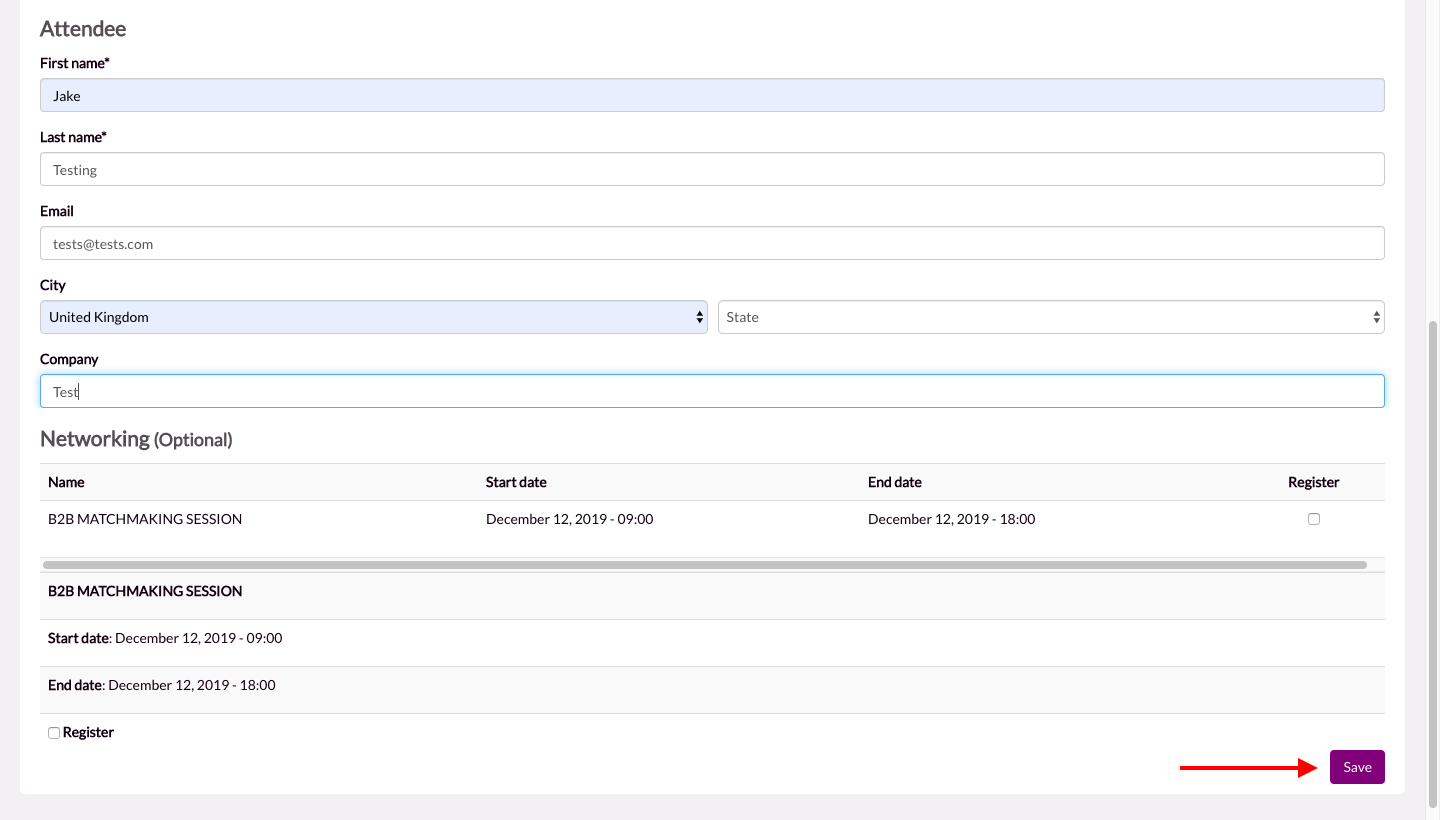
- They will then be taken to a registration form where they can enter their personal details, and click "Save".
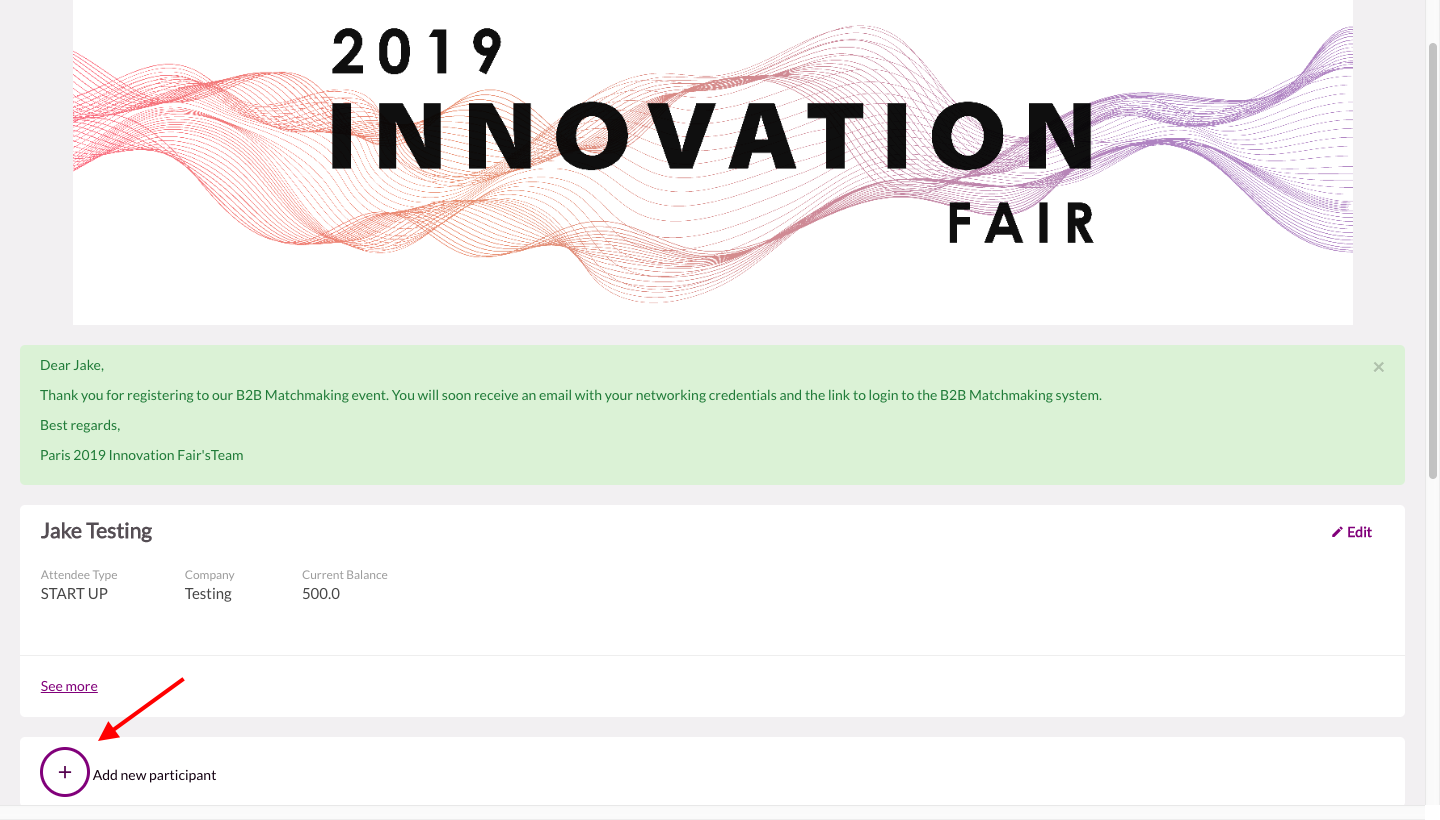
- They will then be taken to a confirmation screen (see how to configure this successful registration message here), where they can add more participants using the "Add new participant" button. They can add as many participants as they want, up to the maximum you have already decided.
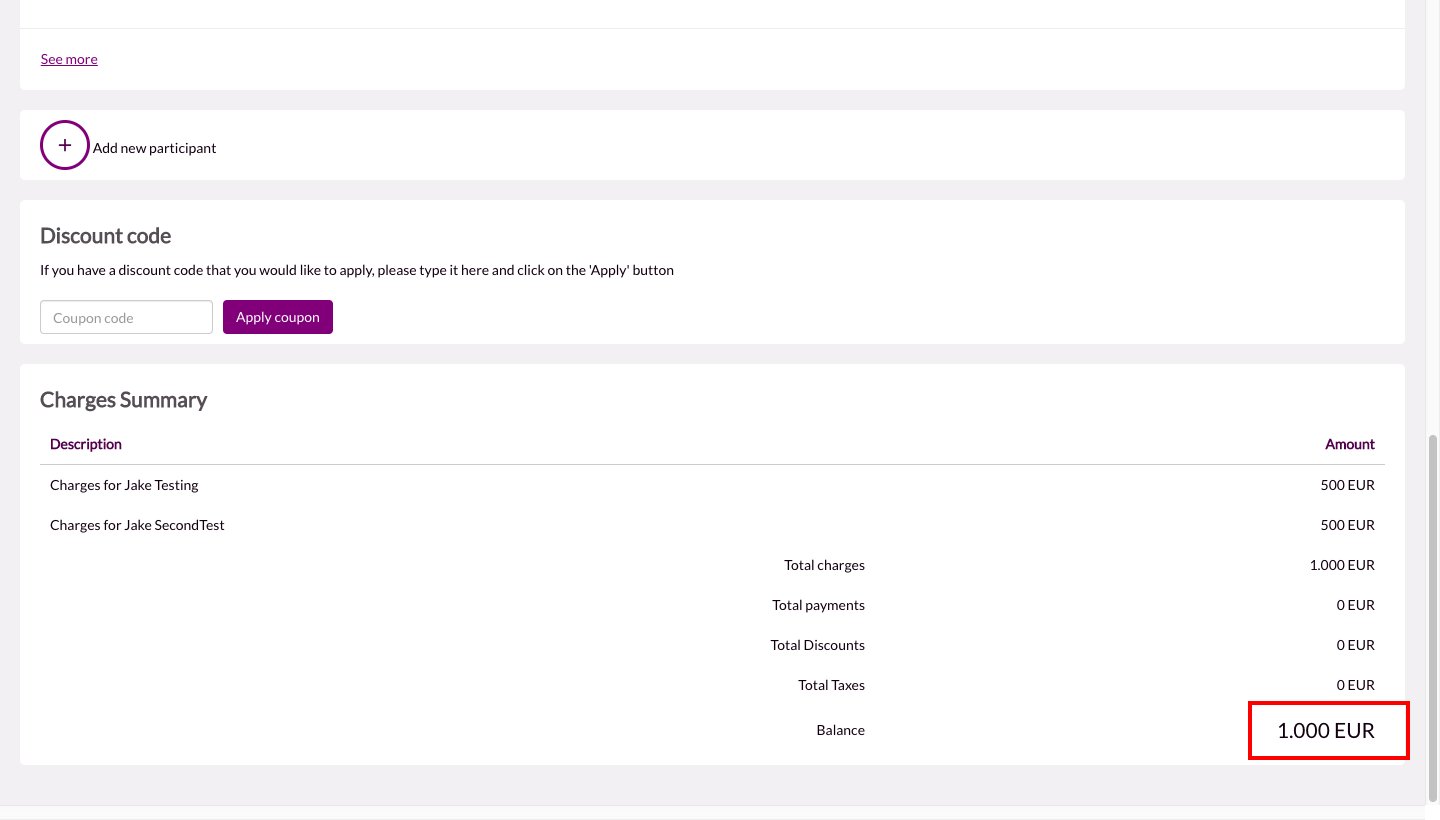
- After entering the details of the other attendees in their group, the payment summary shows that the individual charges are added together into one single charge for the whole group:
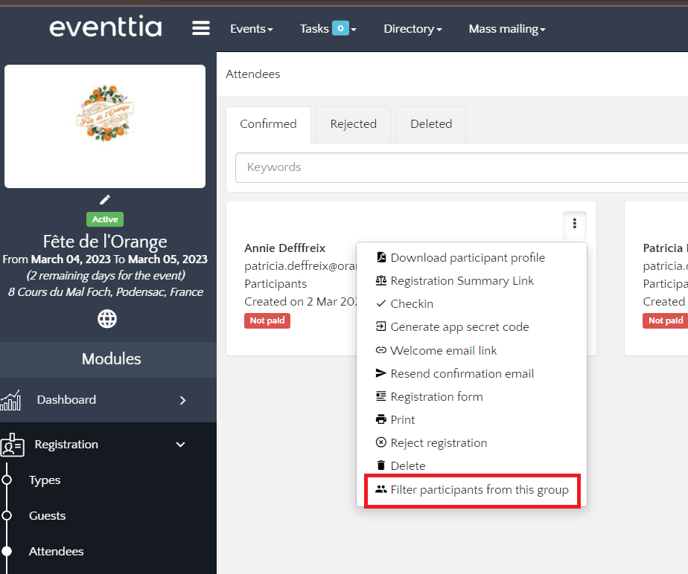
Tip : If you need to search for a participant's group by their name
Go to the attendee module and directly type the name of the participant in the search bar.
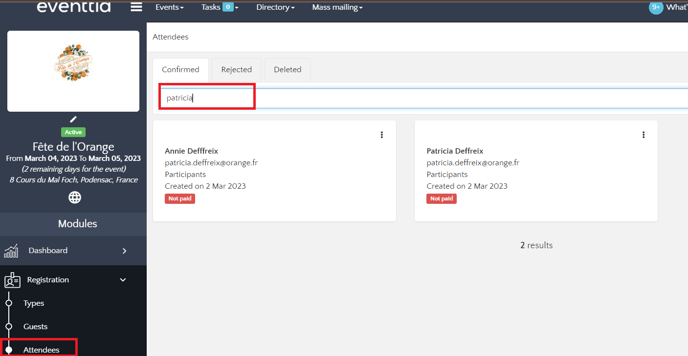
When the search result appears, click on the three little dots of the participant's name and select "Filter participants from this group" at the bottom. It will show you all participants belonging to the same group.
