It's also fairly common to invest good amounts of money on those campaigns since it drives traffic to your event website or registration forms.
In order to prove your ROI (Return on Investment) you usually need to know how many people have converted based on the amount of money you've spent.
Quick Example: If you spent USD 1,000 on an AdWords marketing campaign that sends 100 users to the website, and from those 100 users you managed to get 10 people to register, the acquisition cost for a registration is: USD 1,000 divided by 10. That is USD 100. In other words, the cost of acquiring one registration via AdWords is USD 100. USD 1000 / 80 = USD 12.5 With this example you can see that the acquisition cost via AdWords is USD 100, while using LinkedIn is USD 12.5. Therefore it makes more sense to spend all or at least the biggest part of your marketing ads budget on LinkedIn because it has a lower cost of acquisition.
Here is the real question – what is the point of the conversion pixels? If you don't add it, LinkedIn, Facebook or Google AdWords don't have the option to know how much of the traffic it sent actually got converted. We have good news for all our event planners! You can now add those conversion pixels on Eventtia!
How do I add conversion pixels on Eventtia ?
Step 1.
-
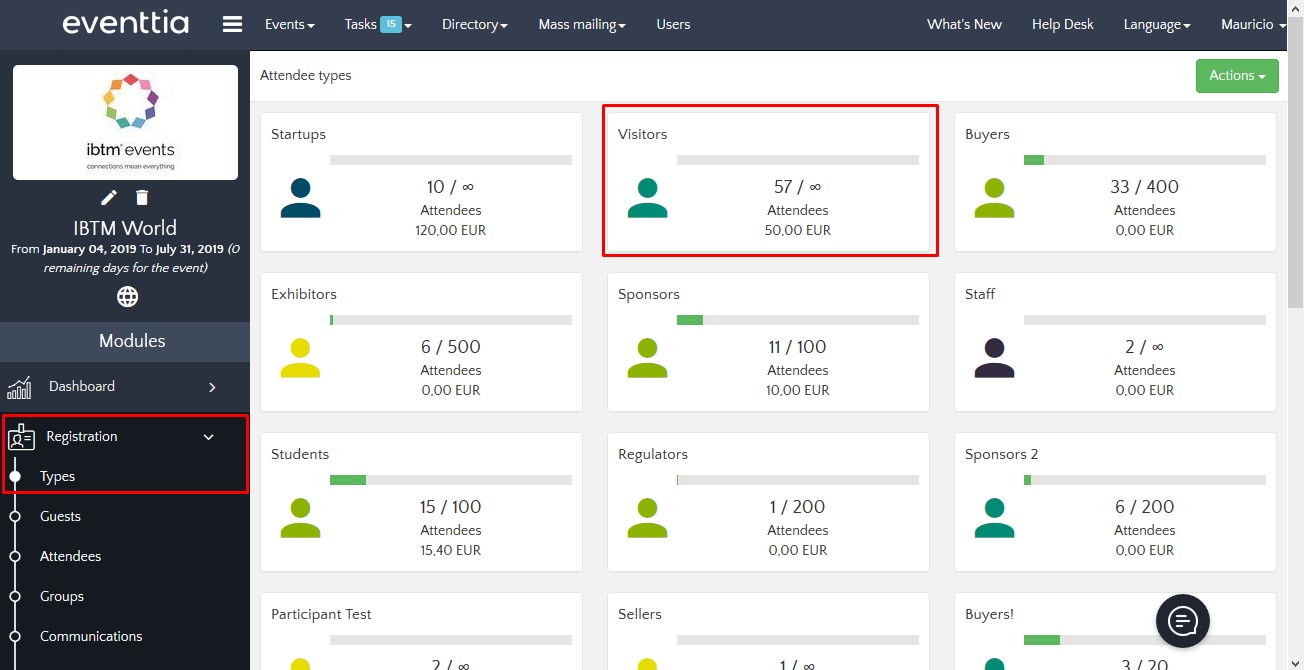
Click on the "Registration" module and then on the "Types" tab, and select the relevant attendee type:

Step 2.
-
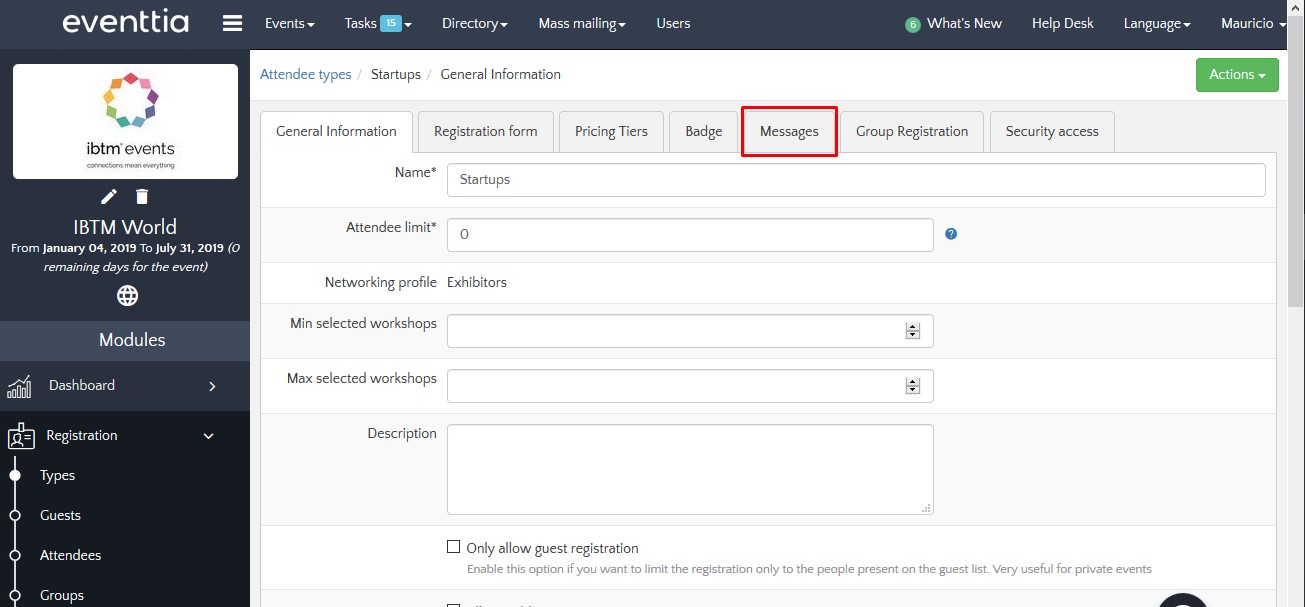
Click on the "Messages" tab:

Step 3.
-
In the "Success registration message" click on "Source":
![]()
Step 4.
-
Paste the conversion pixels (see the links to Facebook, AdWords and LinkedIn at the top of this page) and save:
![]()
