To add the countdown, follow these simple steps:
Step 1.
- Go to the event you’re working on and select the “Website” module.
- Then, click on “Edit” to open the Website Composer.

Step 2.
- Inside the Website Composer, go to the “Headers” section.
- There, you’ll find templates that already include a countdown. Simply choose one and drag and drop it onto your page.

Step 3.
- You can also add a countdown without using a header template, and place it wherever it fits best on your page.
- To do this, go to the “Custom” section and drag and drop the first option: “Empty column.”
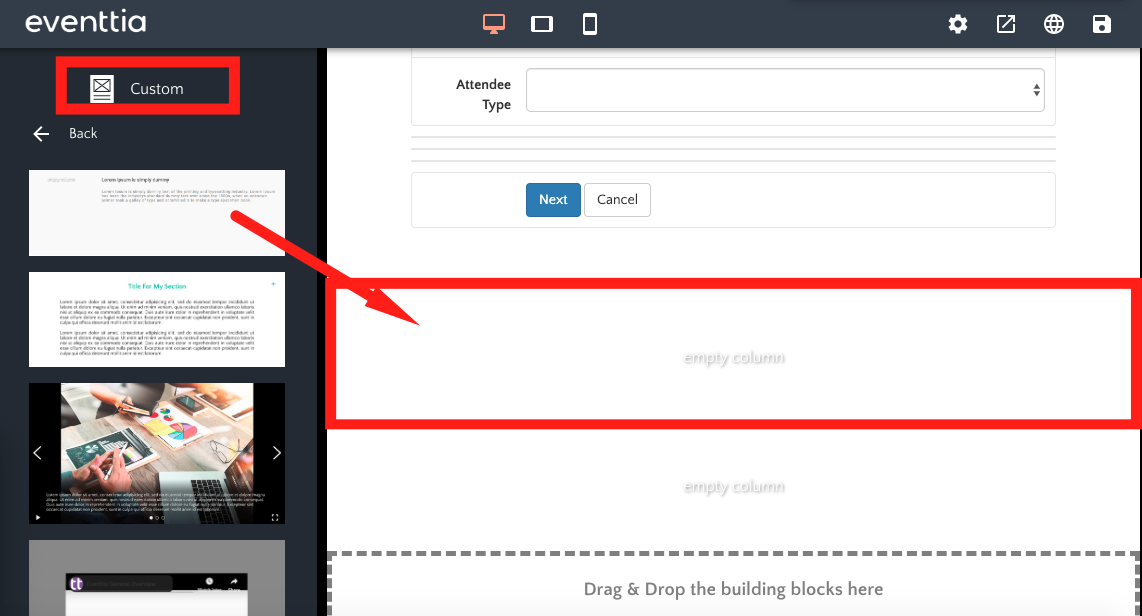
- Once you’ve added the empty column, click on it.
- This will open a menu on the left side of the screen, where you’ll see the option to “Add Content”
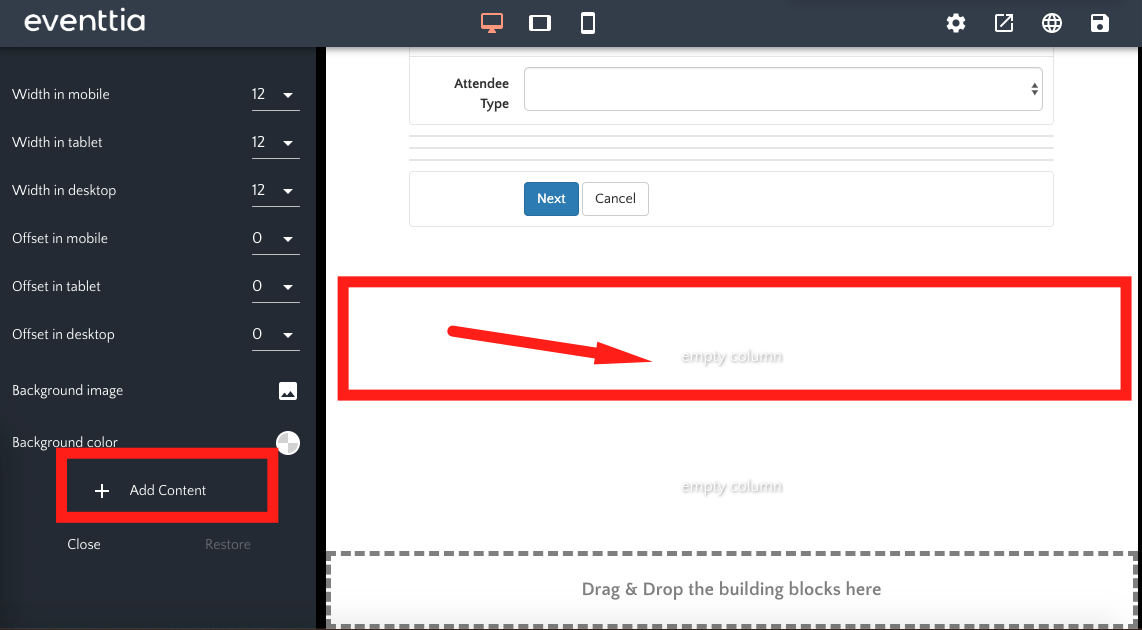
- Select “Countdown” from the list, and the countdown will appear inside the column.
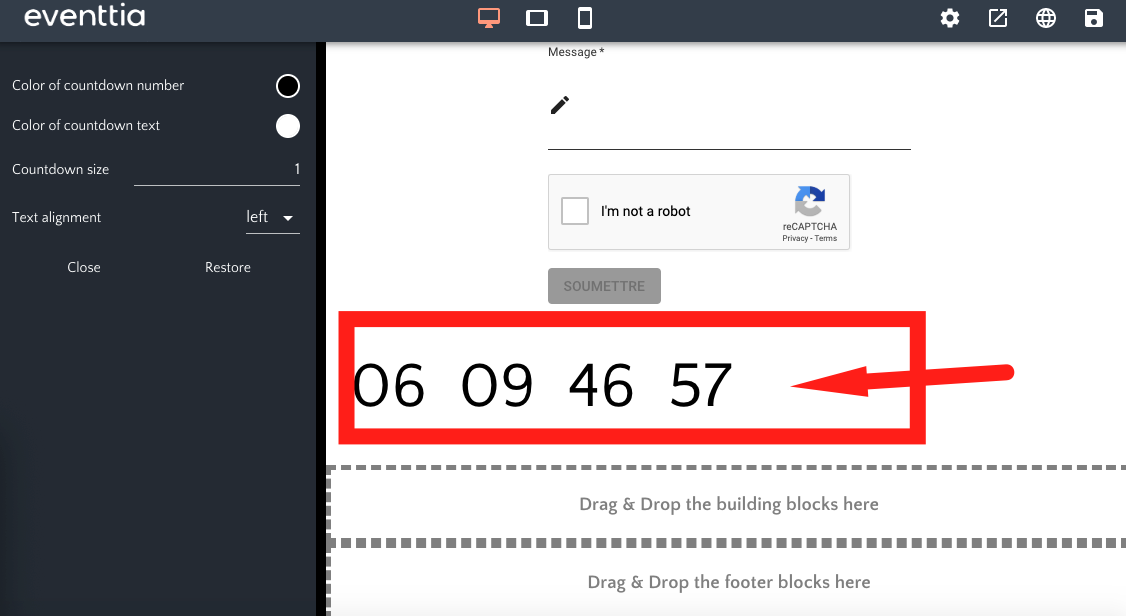
- If it doesn’t show up right away, it’s possible the colors are set to white—be sure to check and adjust the color settings if needed.